In this article, we’ll cover how to track time on work items, where your tracked time shows up, and how to edit time entries.
There are three ways to start the timer in ProCharted.
Step 1: Start a timer from a work item
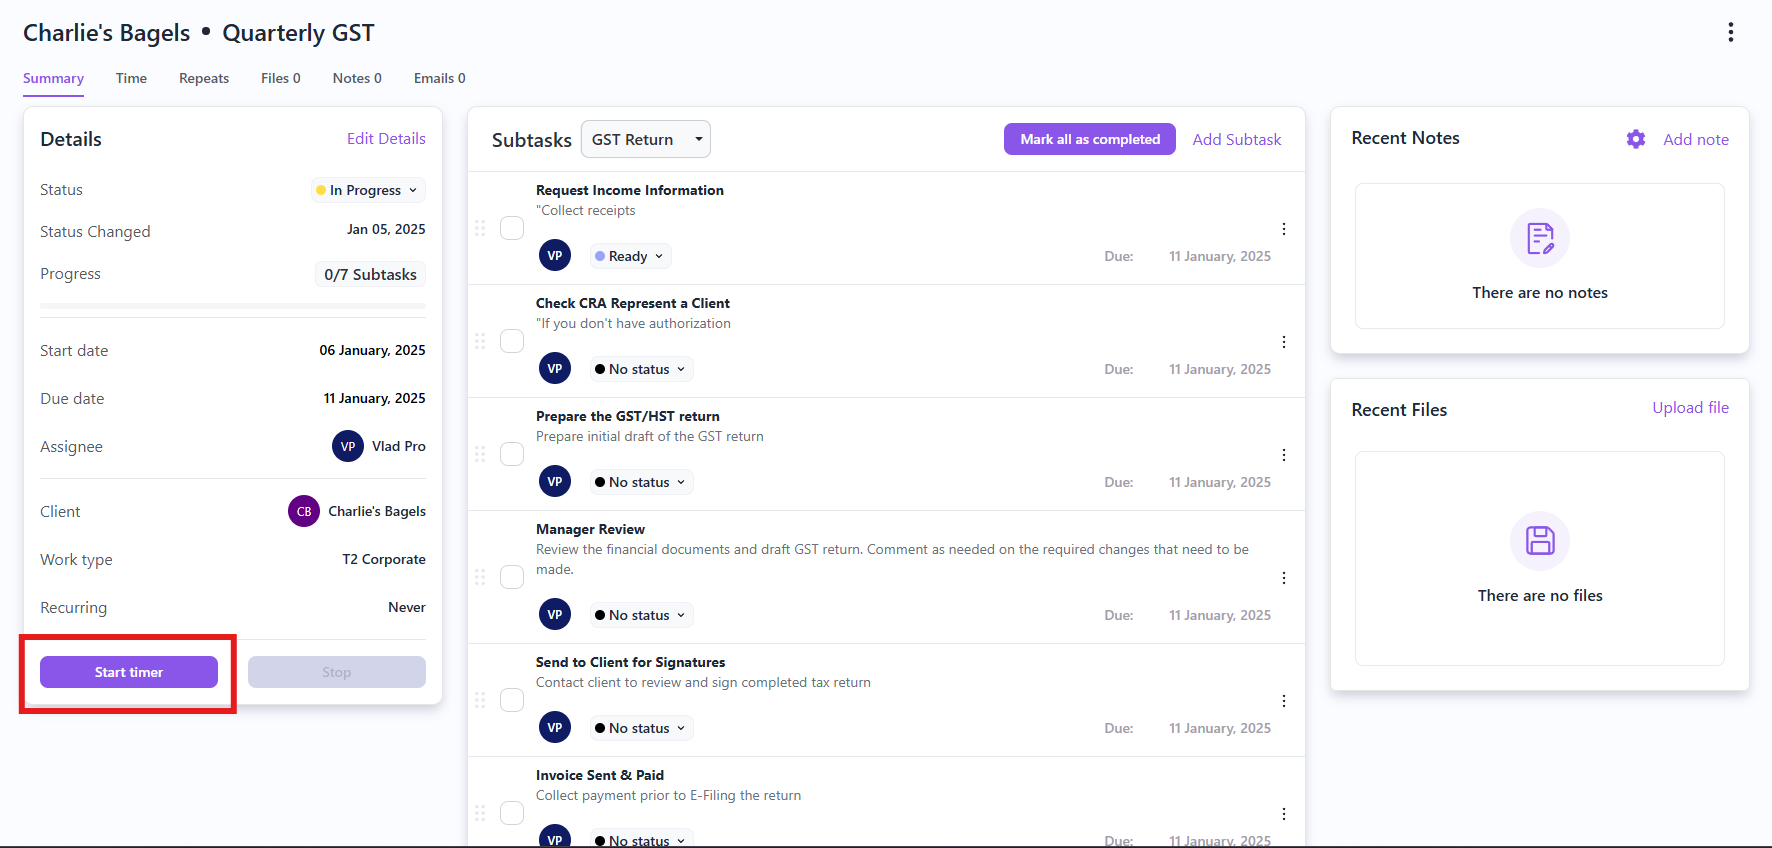
You can start a timer directly from a work item. This will pre-populate the client and work information.
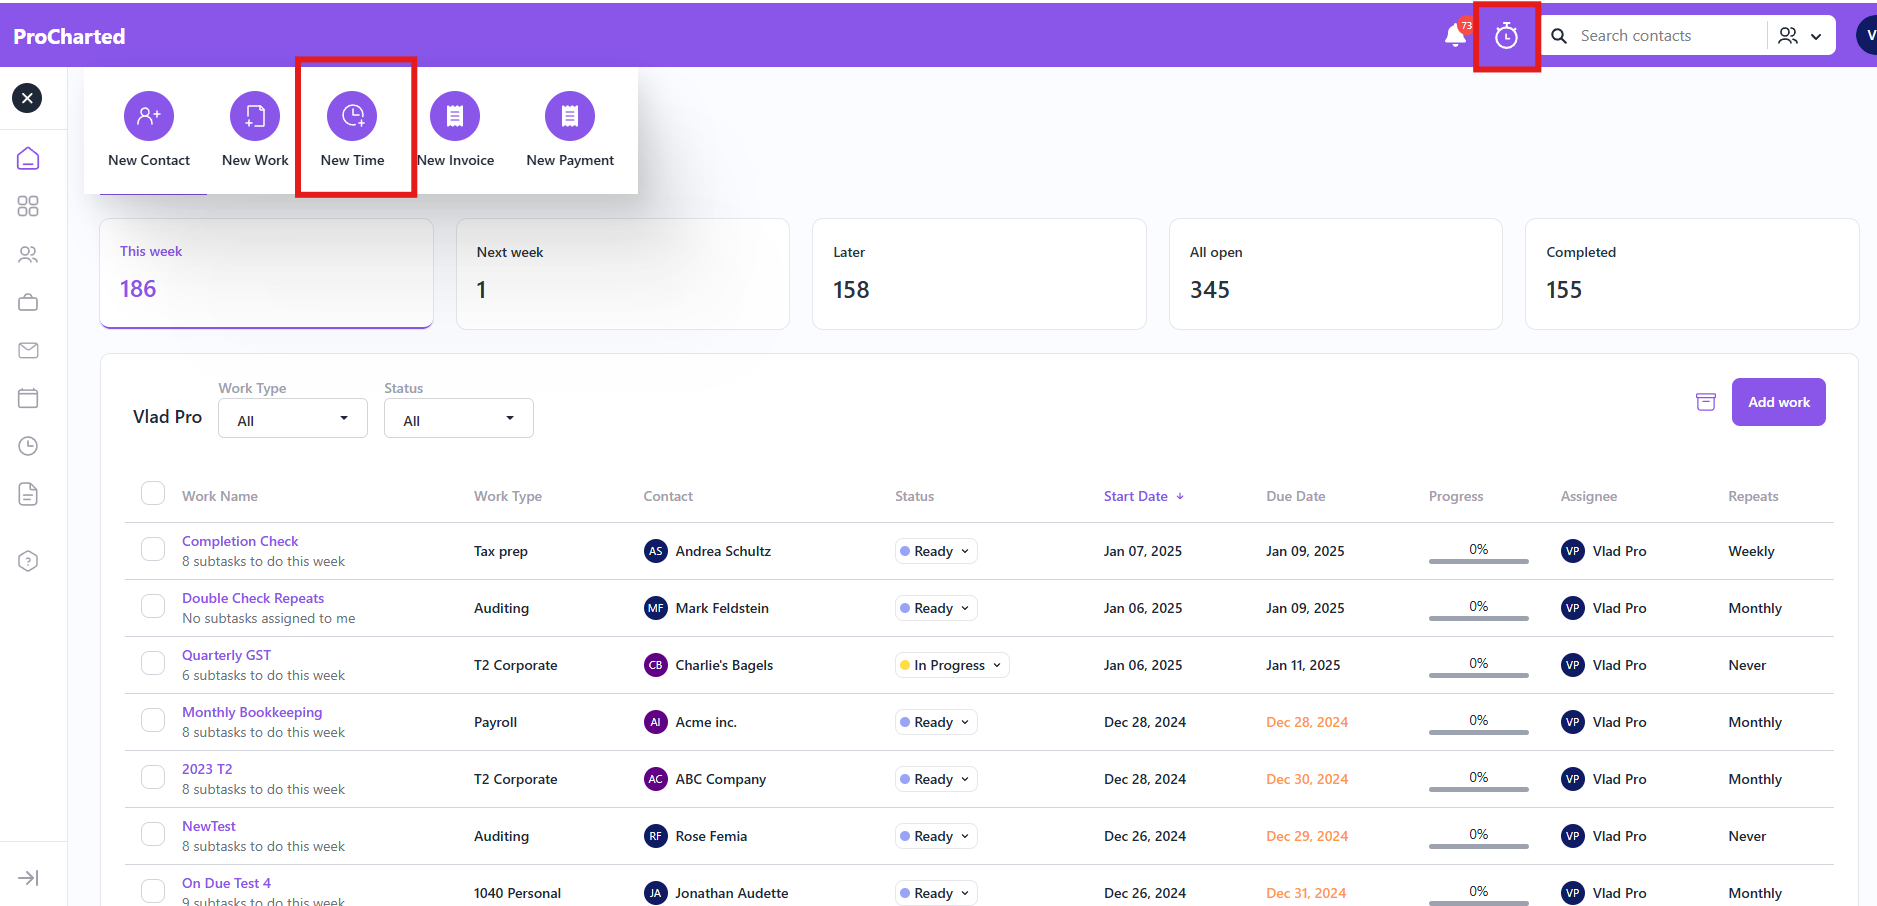
Step 2: The 2 other ways to start a timer are by clicking on the + button on the top left hand side of your homepage, then click on New Time. You can also click on the clock at the top of the navigation bar. If you start an ad hoc timer (not directly from a work item), you’ll be prompted to select the Contact and Work you’re tracking time for.
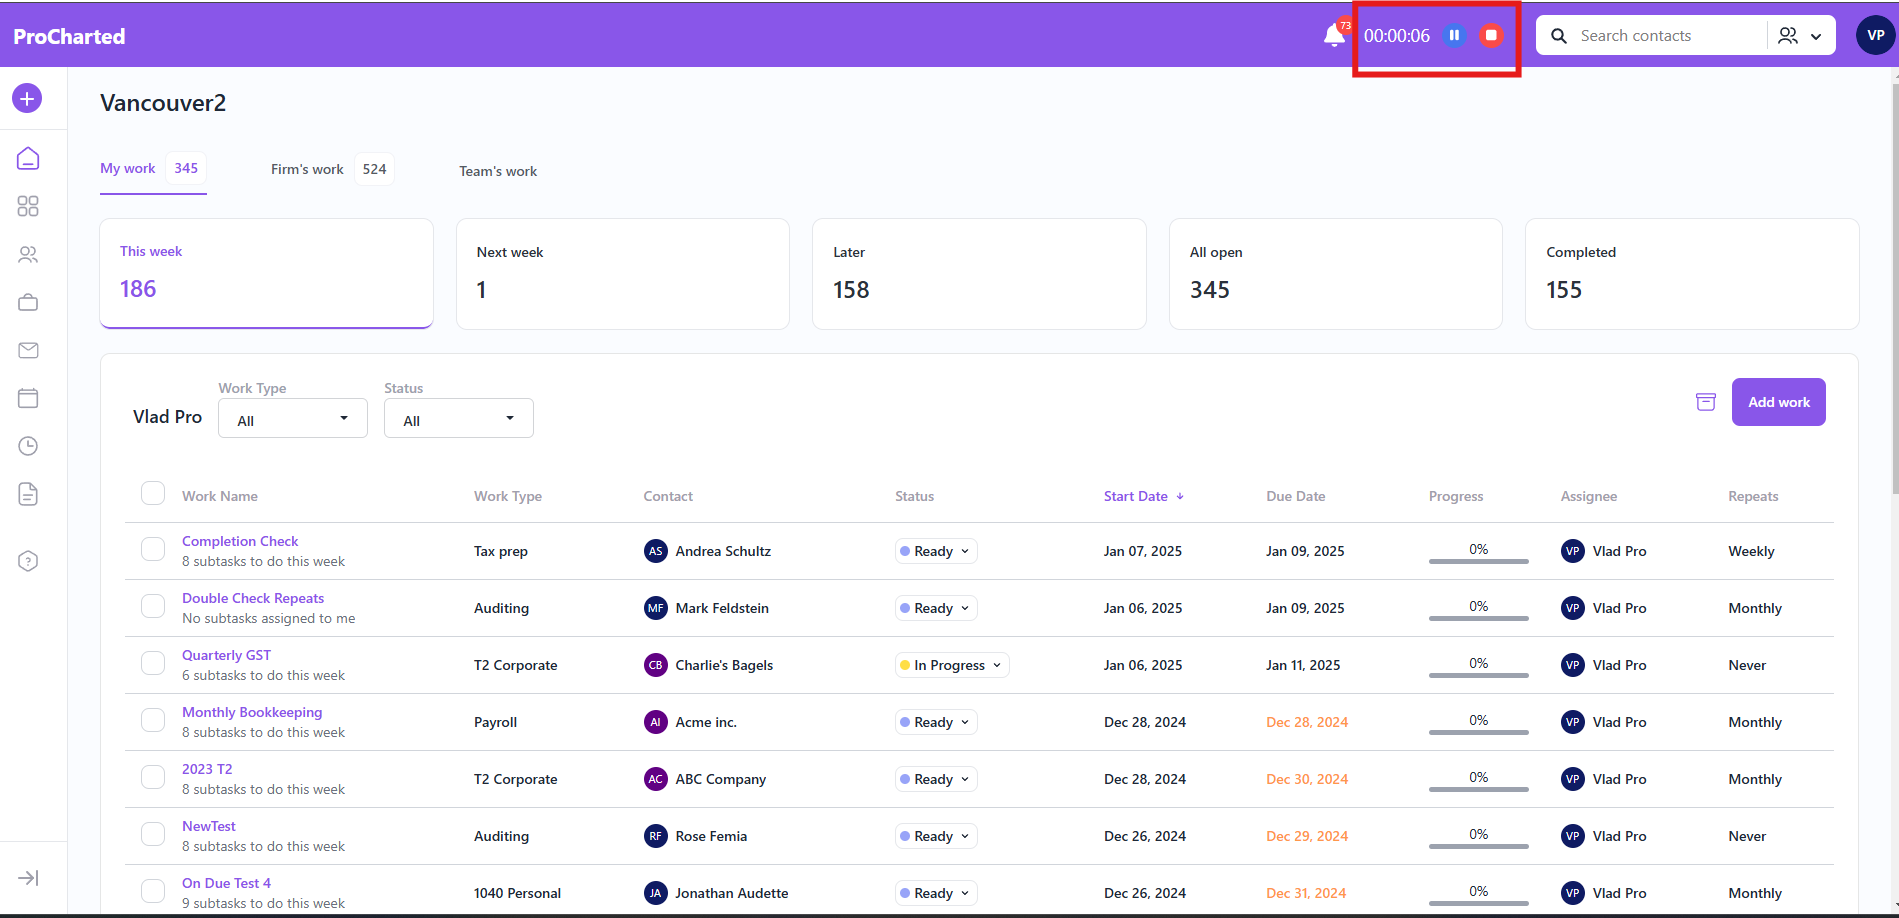
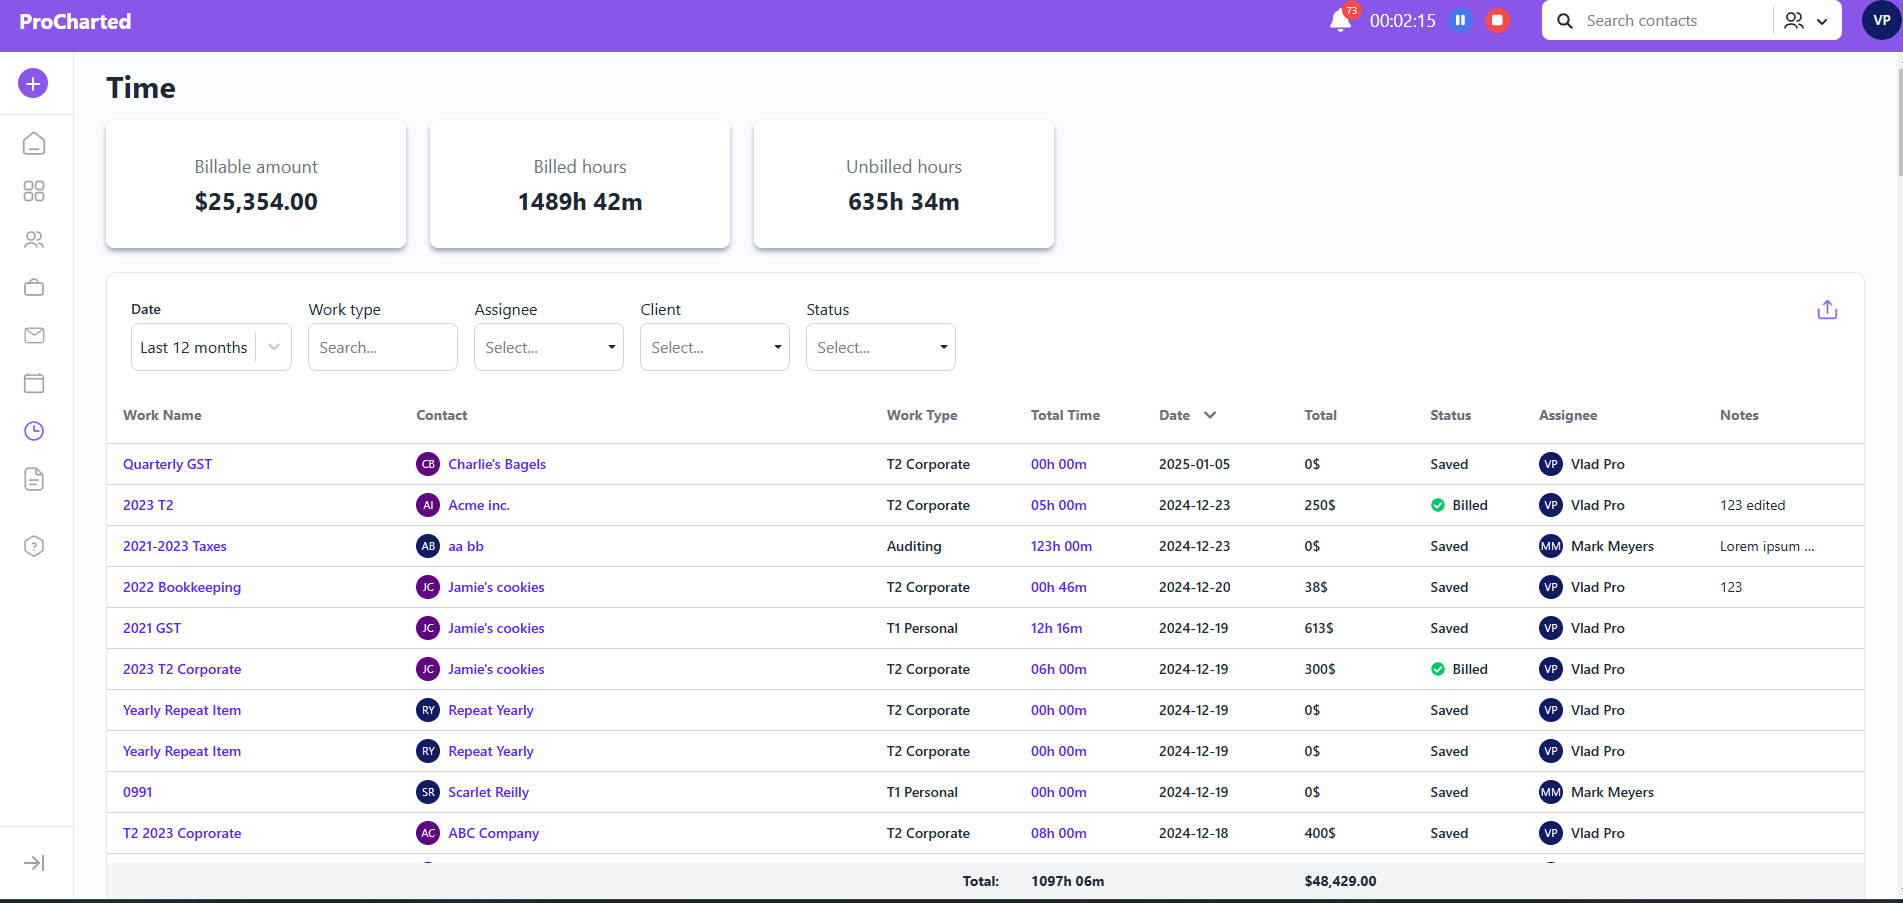
Once you start the timer, you’ll see the accumulated time at the top of your screen next to a pause and stop icon.
Note: click pause to stop time briefly, and it will be replaced with a play icon that starts the time again. Click the stop icon if you want to stop time for that project. A pop-up window will appear asking you to confirm the details of the time entry.
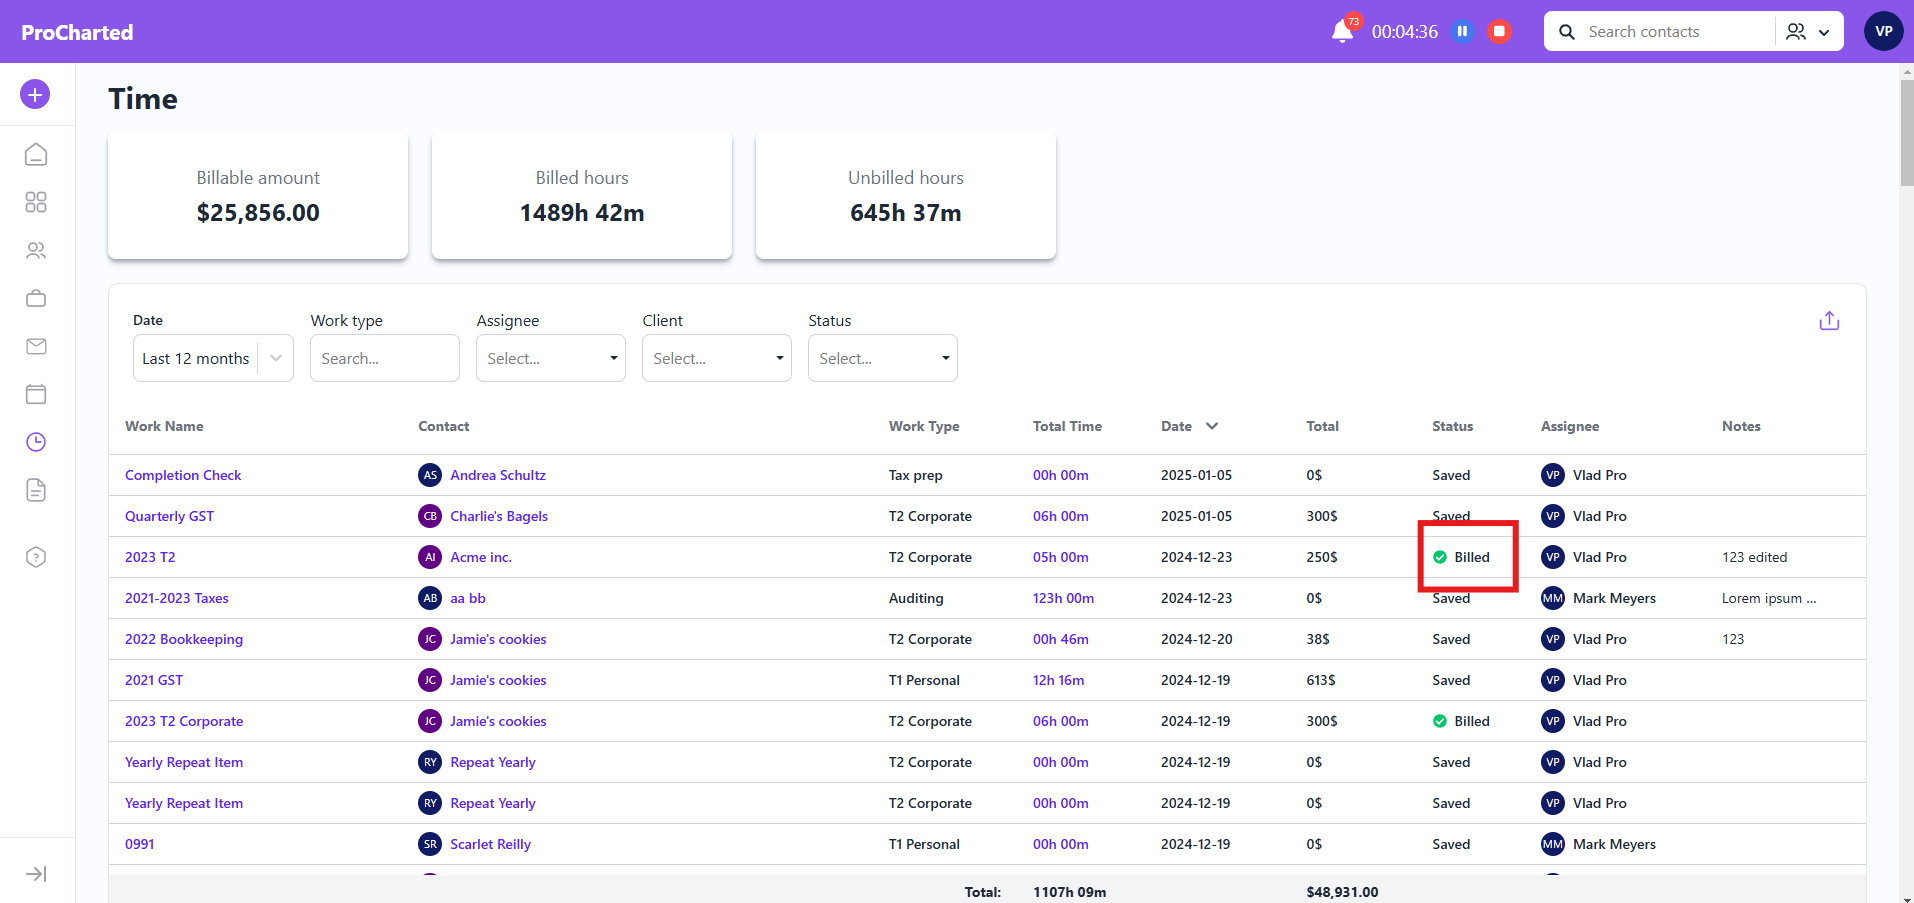
Once you stop time and confirm the entry, it will show up in the Time window. From here, click on the time entry to edit the contact, work item, assignee or duration, or add any notes to the time entry.
Have questions? Please don’t hesitate to contact us for more support!
How to edit time
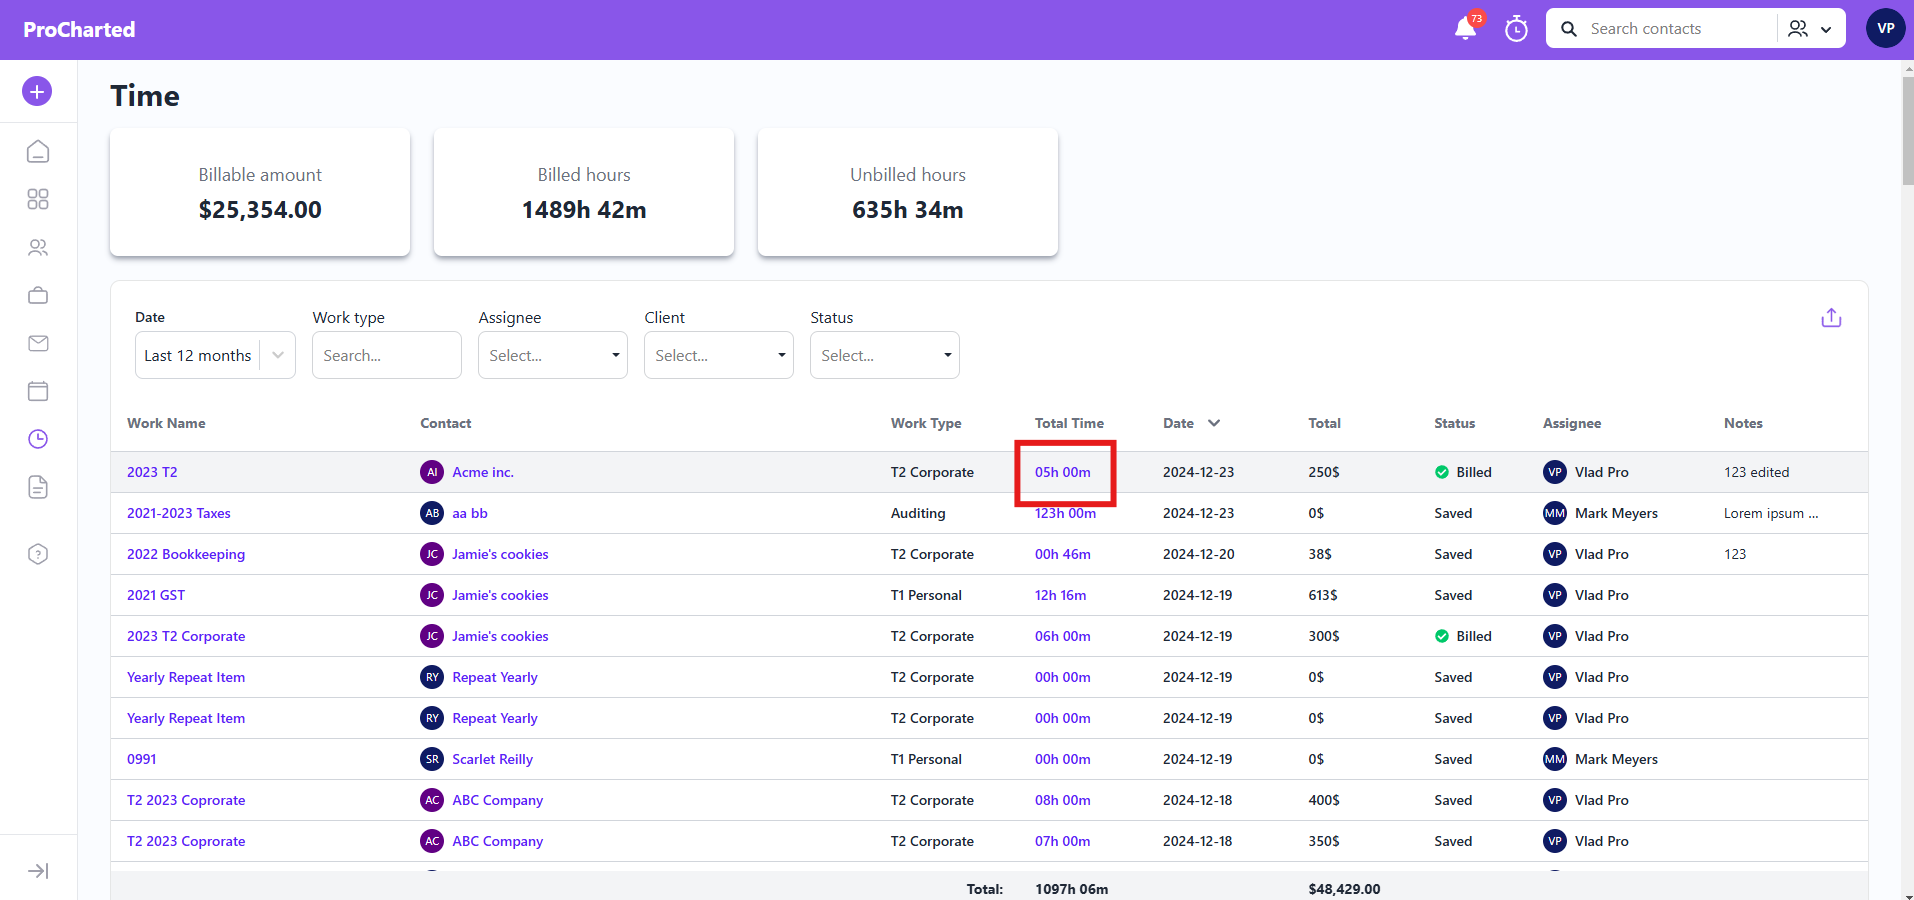
You can edit time by going top the main time page and clicking on the time you want to edit:
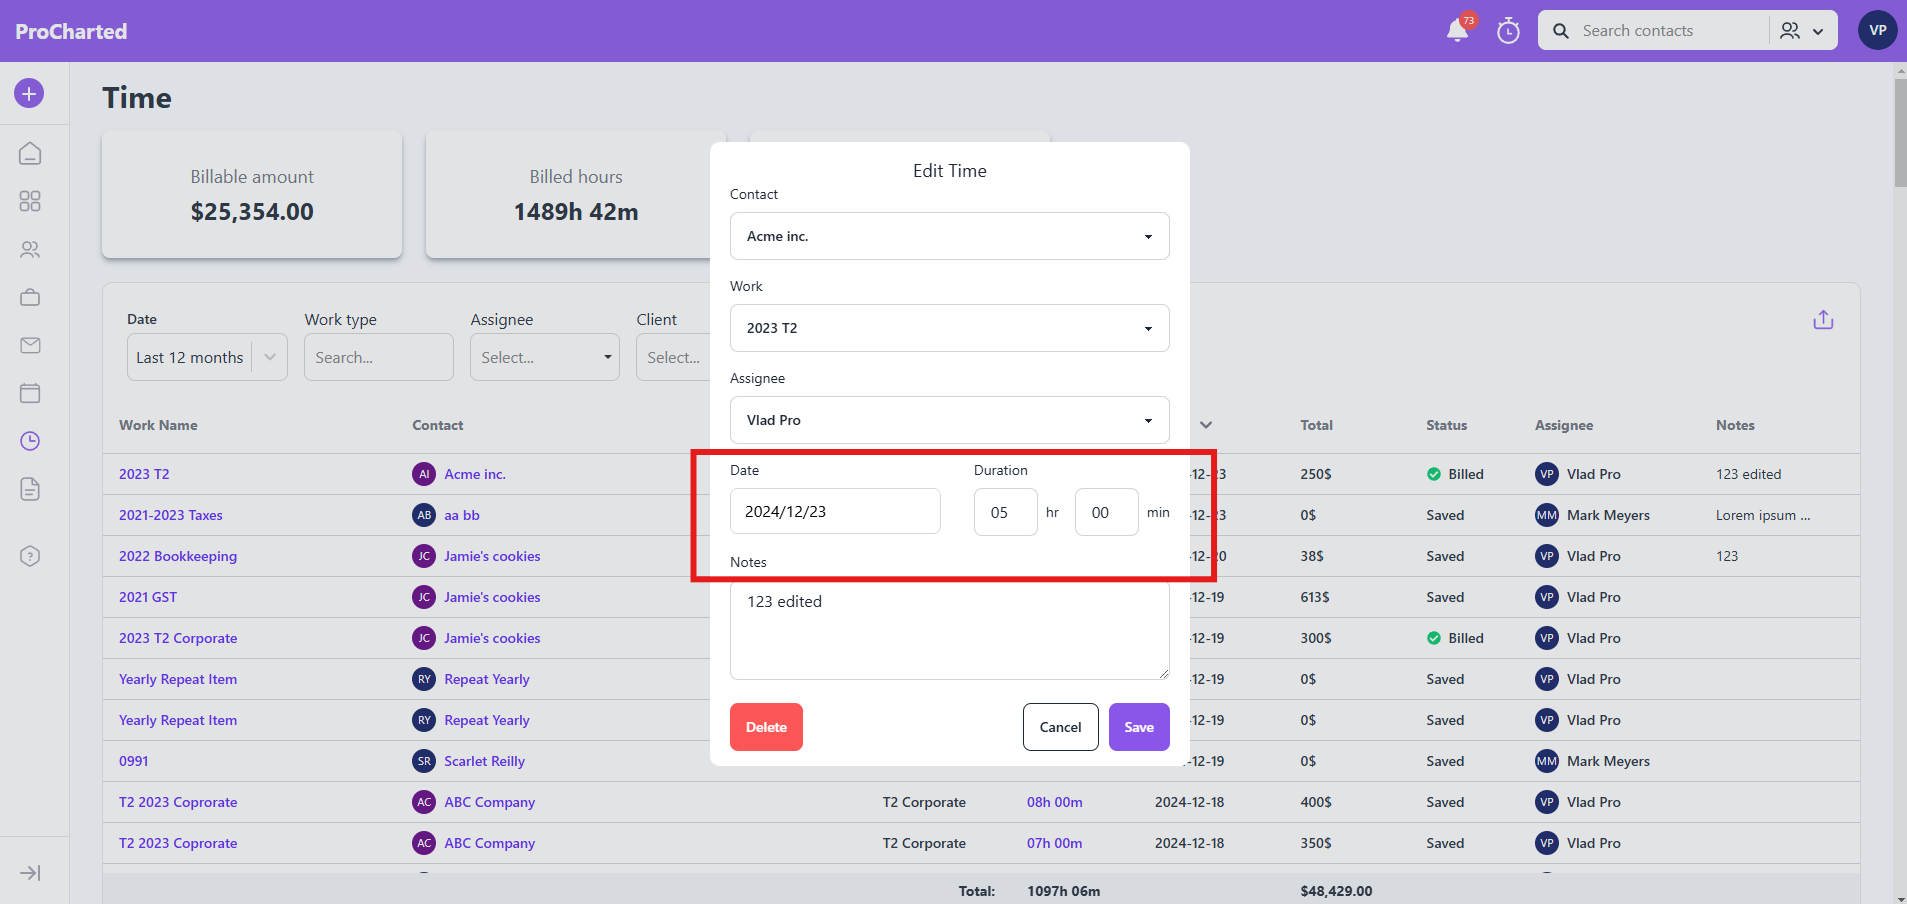
Then here, make the changes you need and click save. It’s as simple as that!
How to bill for time entries
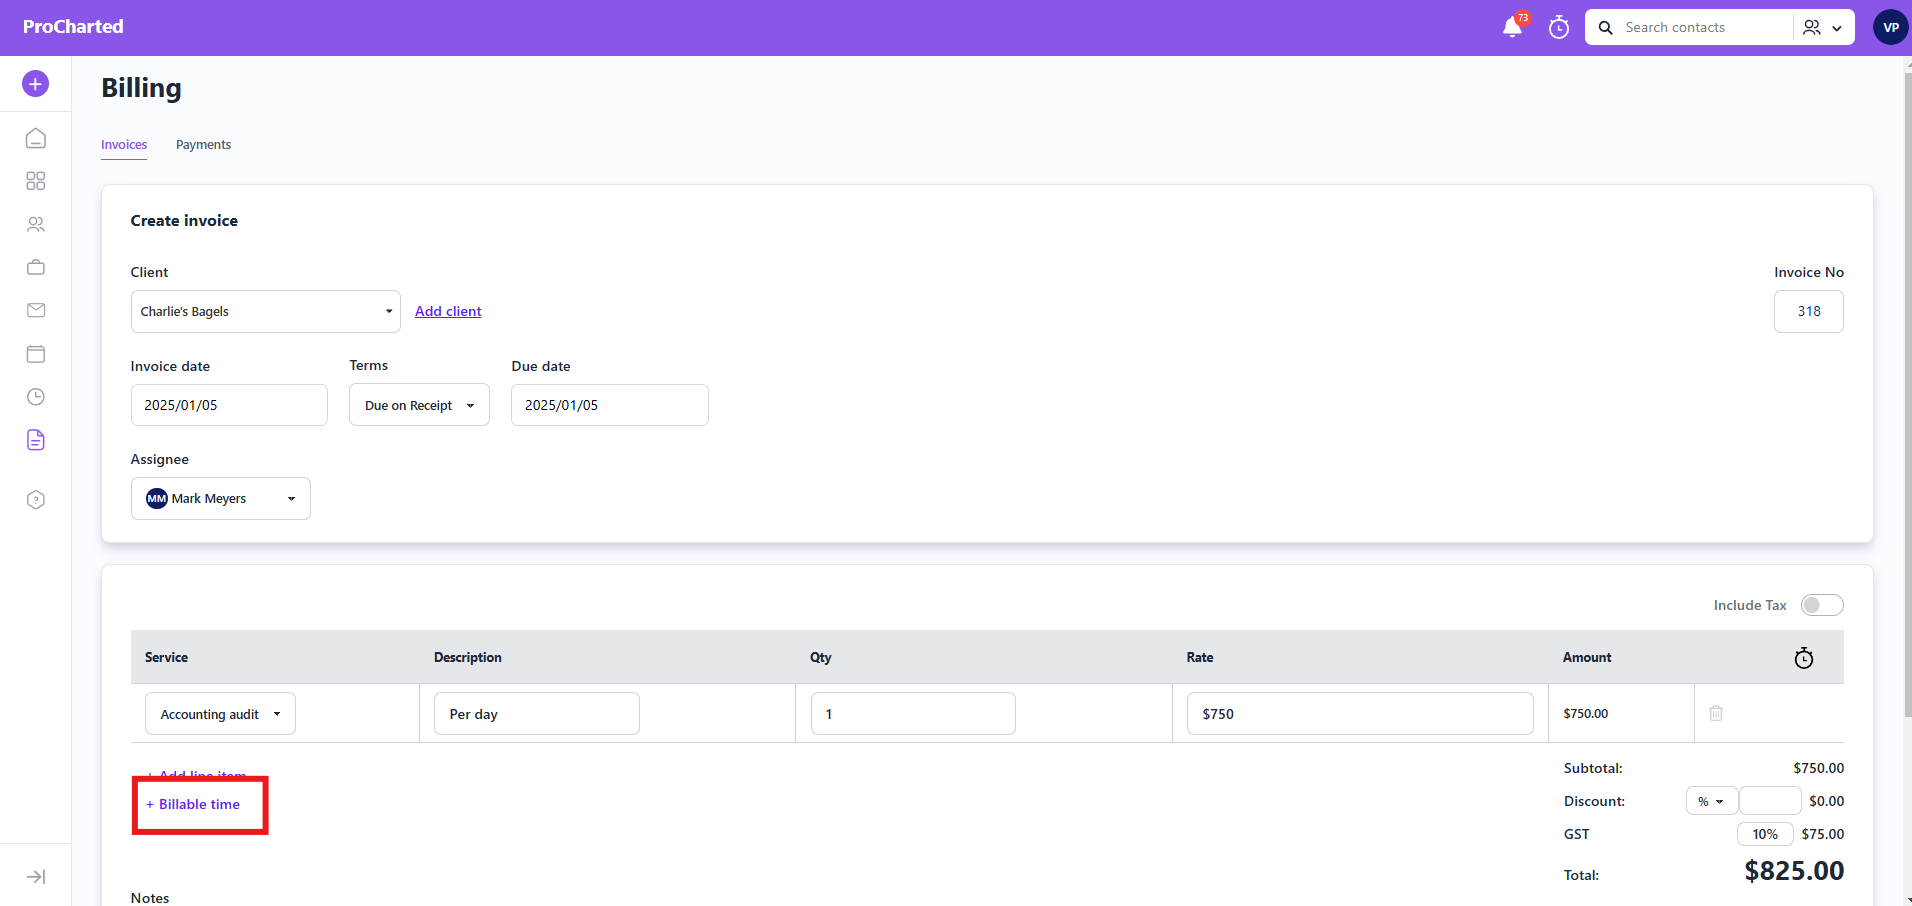
Once a time entry has been recorded, you can bill for it by first creating an invoice and clicking ” + Billable time” on that invoice:
Then choose the time entry you’d like to bill for:
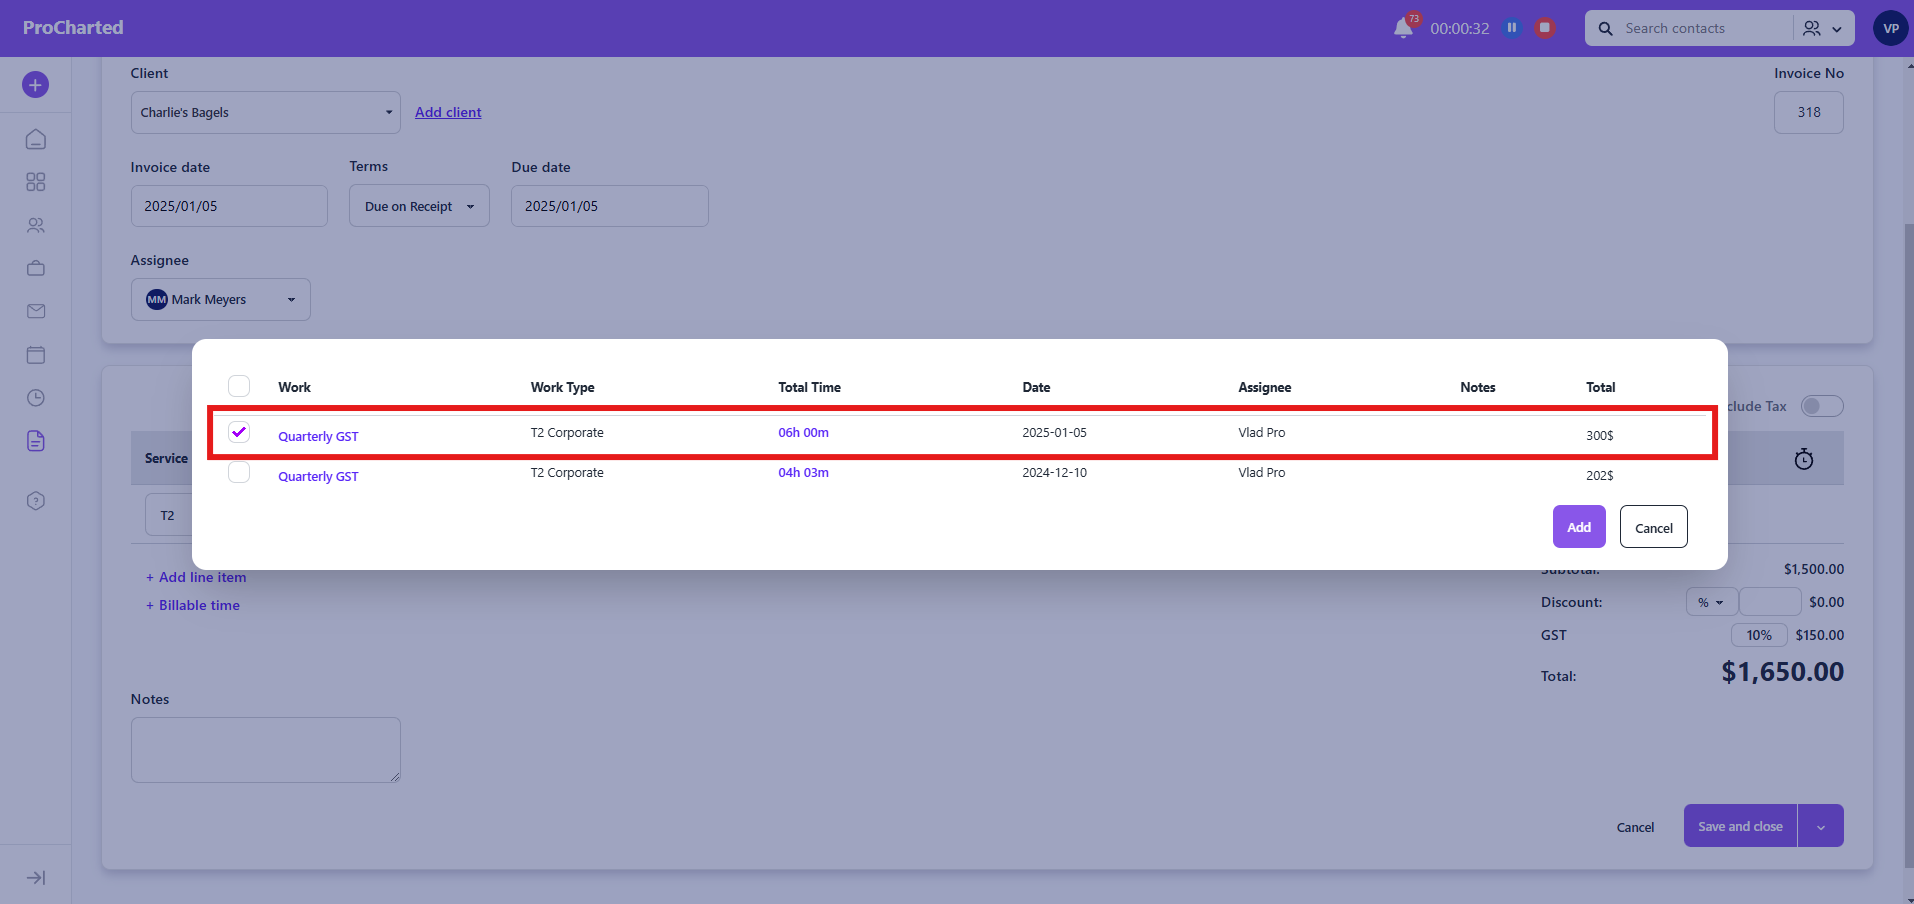
Once you bill for an invoice, it will be marked as “Billed” on the time page and it will not show up the next time you create an invoice for that client: