
Time
Track time with the timer
Start a timer on a work item or subtask, confirm the time as billable or non-billable, and find and edit entries on the Time page.
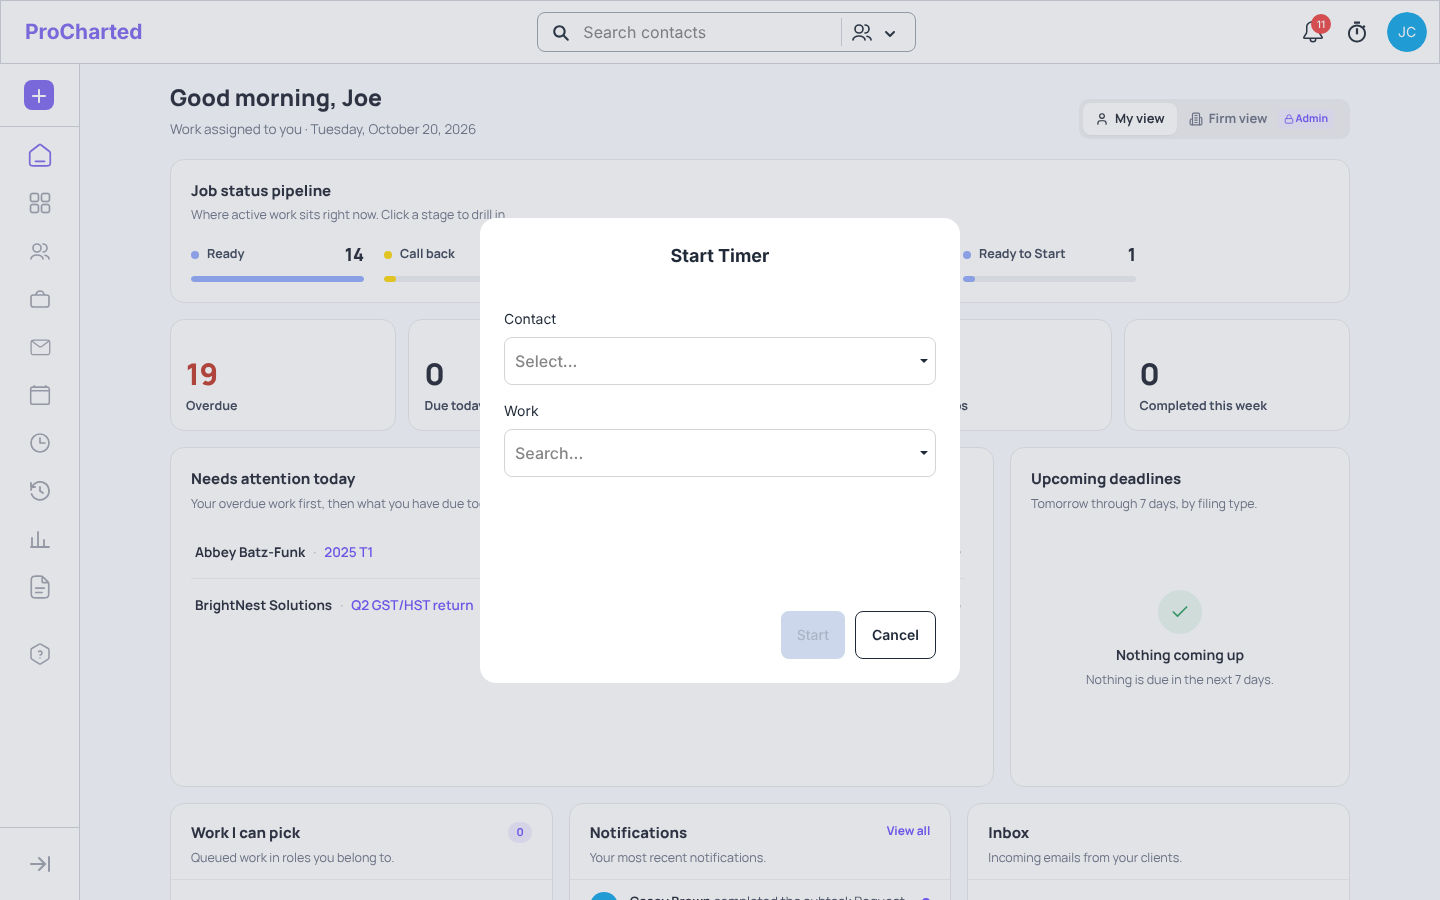
Start a timer
You can start a timer from several places:
- The stopwatch in the top bar. Click it to open the Start Timer window. Choose the Contact, then the Work, and click Start. Start stays grey until you’ve picked a work item (point at it to see “Pick a work item first”): time always belongs to a work item. If you change the client, pick the work item again.
- A work item. On the Summary tab, click Start timer under Time budget. The work item’s Time tab has a Start timer button too.
- A subtask. Click the clock icon next to the subtask (Subtask timer). Time on subtasks adds up to the work item’s tracked time.
- The Time page. Click Start timer at the top right.
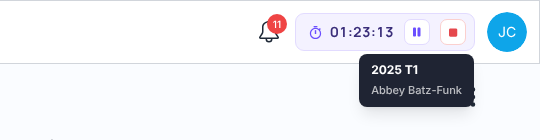
While the timer runs, the top bar shows the running time with a pause button and a red stop button. Hover over it to see which work item and client it’s for. On the work item, the button reads Timer running….
Stop the timer and confirm the time
- Click the red stop button in the top bar (or Stop on the work item). The Confirm Time window opens.
- Check the Date and the Duration (hours and minutes). You can change them here.
- Check the Billable switch:
- On: “This time can be added to an invoice.”
- Off (Non-billable): “Not charged to the client (won’t show on invoices).”
- Add Notes if you like.
- Click Save.
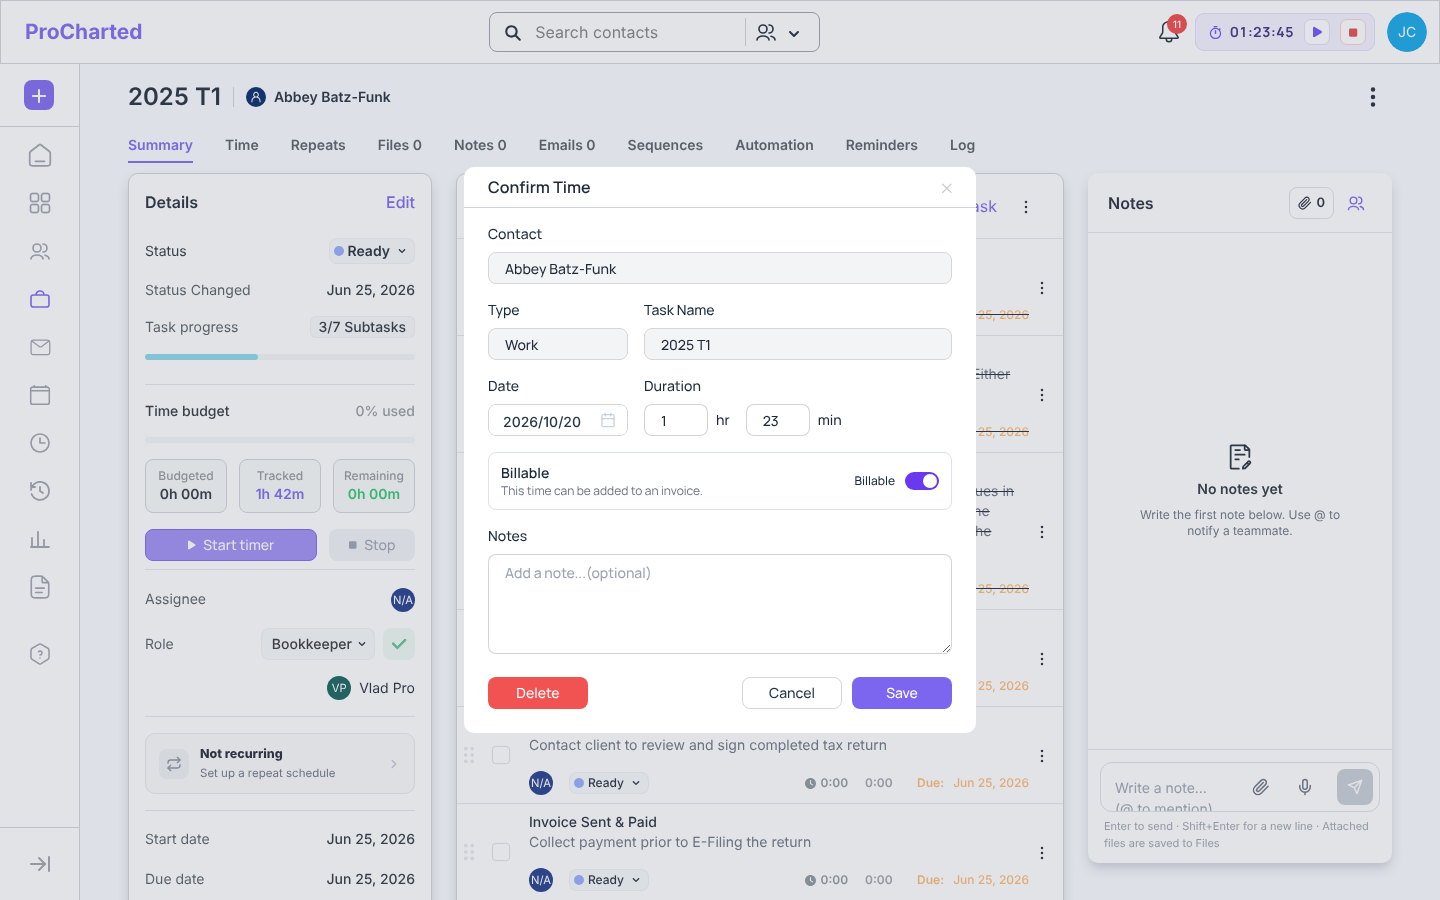
Not ready to stop? Click Cancel and the timer keeps running. Delete throws the tracked time away (you’re asked to confirm first).
Set a billable default for a work type
Admins can decide whether new time starts as billable for each work type.
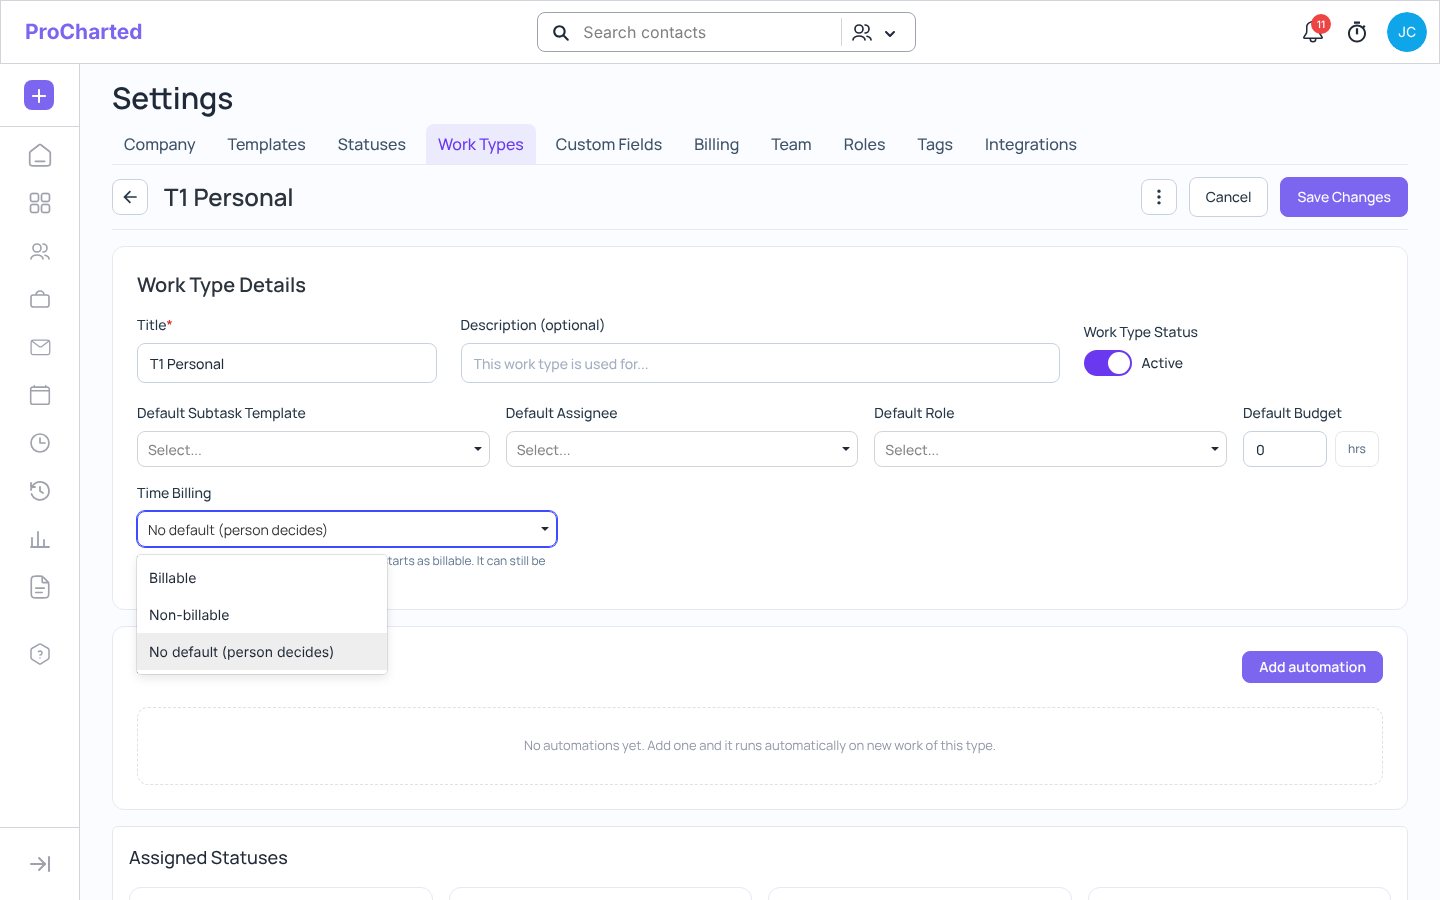
- Click your avatar > Settings > Work Types and open a work type.
- Under Time Billing, choose Billable, Non-billable or No default (person decides).
- Click Save Changes.
The switch in Confirm Time then starts from this default. You can still change it for each entry.
Find and edit time entries
Click Time in the left menu to see all time entries. The cards at the top show the
Billable amount, Billed hours and Unbilled hours.
- Filter by Date, Work type, Assignee, Client and Status. The Status filter has three options: Billed (already on an invoice), Unbilled (billable, not invoiced yet) and Non-billable.
- To change an entry, click ⋮ on its row > Edit. In the Edit Time window you can change the date, duration, billable switch and notes, then click Save.
- To remove an entry, click ⋮ > Delete.
A client’s profile and each work item also have a Time tab with the same cards and list for just that client or work item. Filters that don’t apply are left out: the client’s tab has no client filter; the work item’s tab has only Date, Assignee and Status, and no work name, client or work type columns.
Good to know
- Time that’s already on an invoice is locked: the switch shows “Already on an invoice.” and can’t be changed.
- Only billable time can be added to an invoice. Non-billable time is never offered.
- Tracked time counts toward the work item’s Time budget (Budgeted, Tracked, Remaining).
- The dollar amounts are based on each team member’s Hourly rate (set by an admin in Settings > Team).