
Settings
Work types: defaults, automations and statuses
Create a work type, set its defaults (template, assignee, role, budget, time billing) and automations, and choose its statuses.
Before you start
- You need to be an admin, or have the View Settings permission.
- Your firm already has a set of default work types. Check them first in Settings > Work Types – you may only need to adjust them.
Create a work type
- Click your avatar > Settings > Work Types.
- Click + New Work Type.
- Type a Title and, if you like, a Description (optional).
- Click Add Work Type. The work type is created and its page opens.
The other sections – the defaults, Automation and Assigned Statuses – only appear once the work type has been created.
The Work Types list is in alphabetical order (numbers first). To change an existing work type, click its row in the list. Make your changes and click
Save Changes at the top right. If you try to leave with unsaved changes, ProCharted asks whether to Leave without saving or Stay on page.
Set the defaults
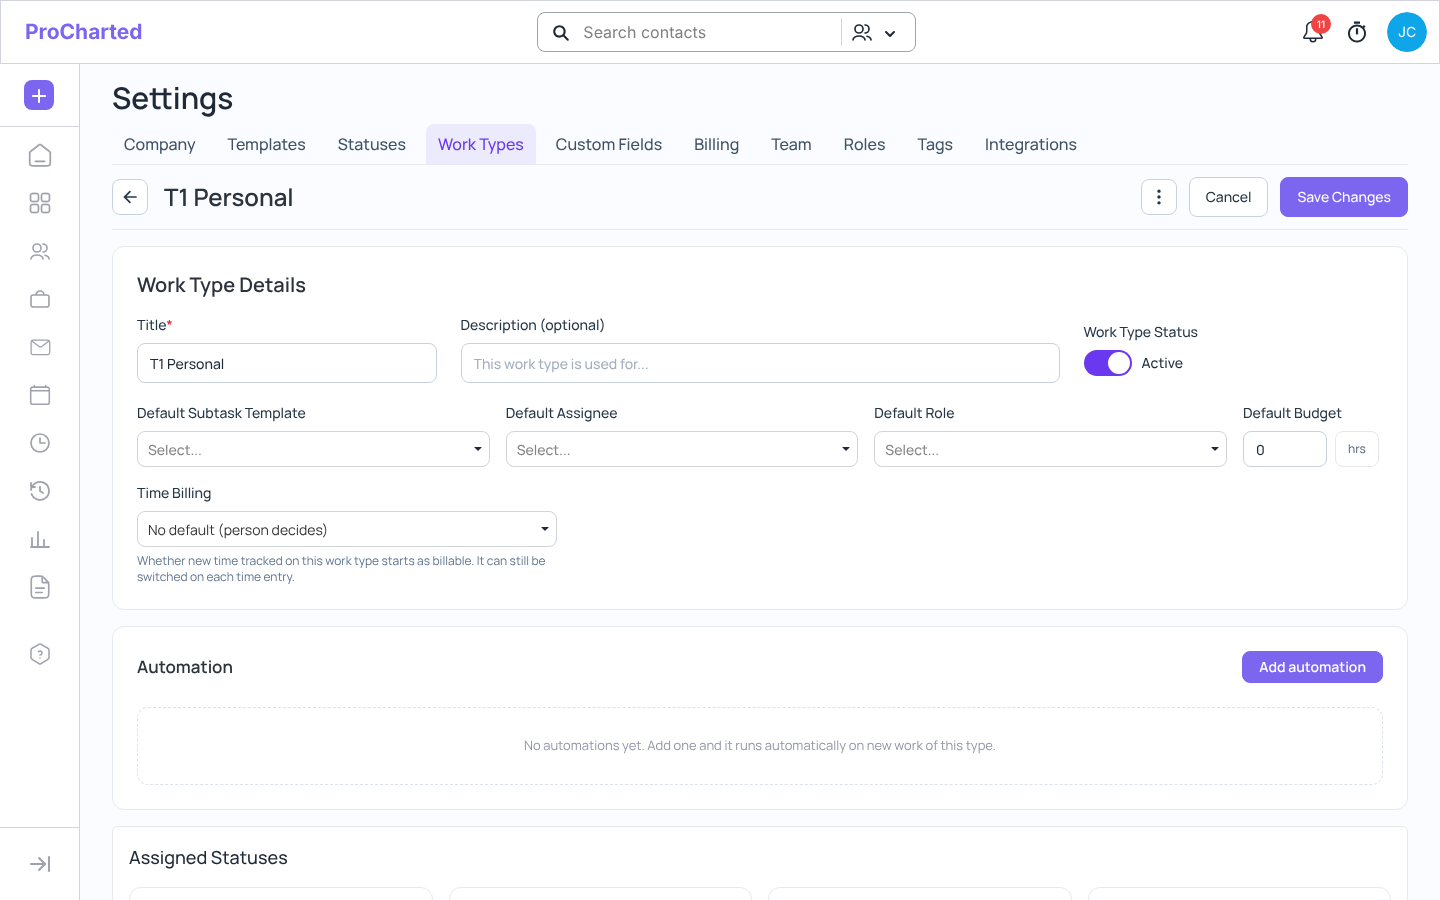
In Work Type Details:
- Work Type Status – the switch shows Active or inactive.
- Default Subtask Template – the checklist of subtasks new work starts with.
- Default Assignee – who new work is assigned to.
- Default Role – the role new work goes to (it then waits in Queued until someone in that role picks it up).
- Default Budget – the time budget in hours.
- Time Billing – whether time tracked on this work type starts as Billable, Non-billable or No default (person decides). It can still be switched on each time entry.
Click Save Changes.
What the defaults do
When someone clicks Create > New Work and picks this work type, the subtask template, assignee, role and budget fill in automatically. They can still change any of them before clicking Create. Time tracked on the work later starts as billable or non-billable according to Time Billing.
Add automations to a work type
In the Automation section, click Add automation and build the rule: IF a condition (for example The work has status of a status), THEN an action (for example Send team member notification). Click Save.
Automations on a work type run automatically on new work of this type – you don’t have to add them to each work item. See Automations for all the conditions and actions.
Choose the statuses
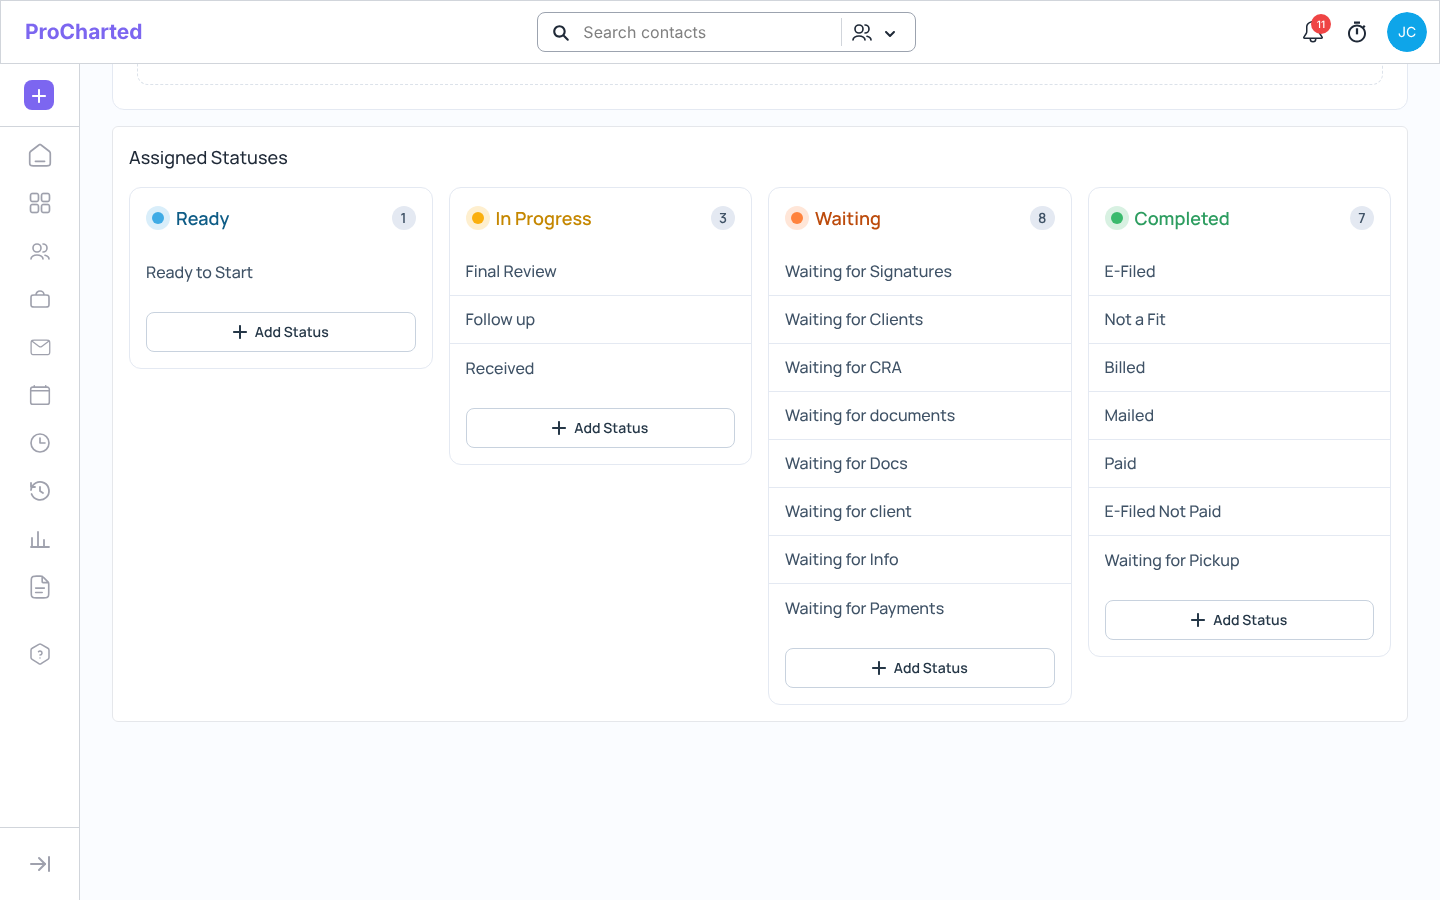
The Assigned Statuses section has four columns: Ready, In Progress, Waiting and
Completed. Only the statuses listed here can be picked on work items of this work type.
- Click + Add Status under a column, tick statuses and click Done, then Save Changes.
- Point at a status and click the X to take it off this work type. The status itself is not deleted.
The full steps are in Create a status and add it to a work type.
Deactivate or delete a work type
In the work type list, open the ⋮ menu on the row: Edit, Deactivate or Delete.
- Deactivate hides a work type you no longer use, without losing anything. You can reactivate it at any time. Use the All / Active / Inactive switch to find inactive ones.
- Delete removes it permanently. A work type that is already used on work can’t be deleted – deactivate it instead.
Tips
- Deactivate the default work types you don’t need rather than deleting them.
- Changing a work type’s defaults affects new work only. Work items that already exist keep what they have.
Related articles
- Create a status and add it to a work type
- Create new work
- Subtasks and subtask templates
- Automations
- Roles and queued work
- Time tracking