
Automation
Automations: let ProCharted do the routine steps
Set up IF/THEN rules on work items, subtasks, work types and subtask templates to notify people, add team members, change statuses or email clients.
Before you start
- To use one of your own statuses (for example Waiting for documents) in an automation, the status must exist in Settings > Statuses and be added to the work item’s work type. The automation only offers the statuses of that work type.
- To send a client email, first create an email template (Settings > Templates > Email templates). See Email templates.
Add an automation to a work item
- Open the work item and click the Automation tab.
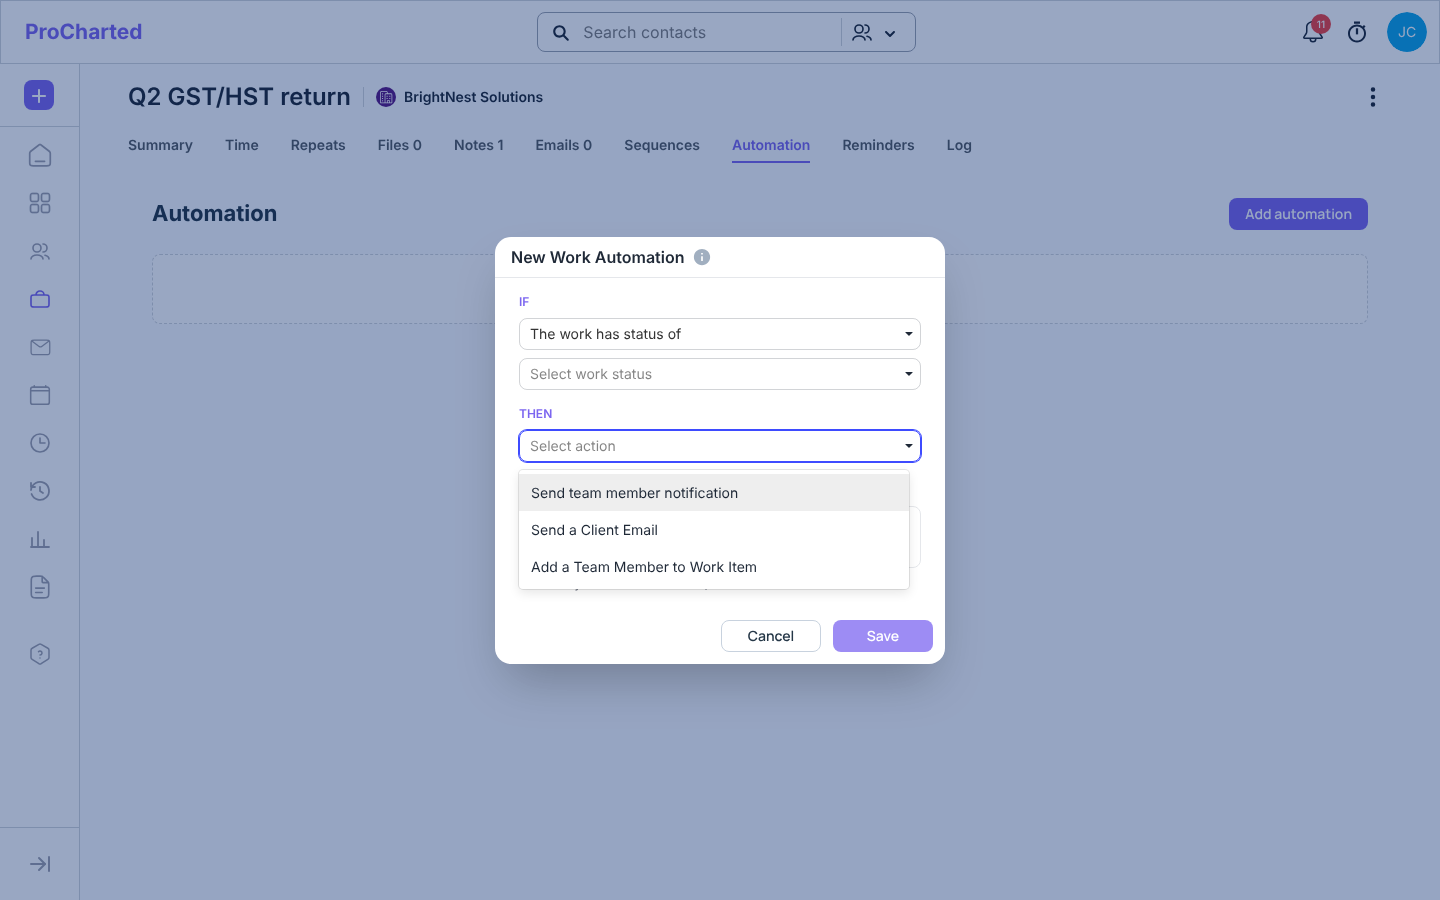
- Click Add automation. The New Work Automation window opens.
- Under IF, pick a condition:
- The work has status of – then pick the status in Select work status.
- The work reaches a date – then enter a number of days.
- The due date is reached.
- Under THEN, pick an action and fill in the box under it:
- Send team member notification – pick the person.
- Send a Client Email – pick the email template.
- Add a Team Member to Work Item – pick the person to add as an assignee.
- Change the status – only offered with the two date conditions.
- Check the Automation Summary: it reads the rule as a sentence, for example “When work item July 15 has a status of Final Review, send …”.
- Click Save.
The rule now shows on the Automation tab, with who created it and when. Use its delete button to remove it.
“Future Events Only”
When you save a status-based automation, ProCharted warns: “This automation will only run when the selected status changes in the future. Existing items will not trigger this automation.” Click Save Anyway to keep it.
So if the work already has that status, nothing happens now. The rule runs the next time the work moves into that status.
Add an automation to a subtask
- On the work item’s Summary page, open the subtask’s ⋮ menu > Automation.
- The New Subtask Automation window opens. Pick a condition, for example the previous subtask has a status of, all previous subtasks are completed or subtask has reached its due date.
- Pick the action, for example change the current subtask status to a status, or send a team member a notification. Only the actions that fit the condition are offered.
- Click Save.
A yellow lightning icon (⚡) appears next to the subtask’s title. Hover over it to read the rule.
Automations on a work type
Add automations to a work type once, and every new work item of that type gets them.
- Click your avatar > Settings > Work Types and open the work type.
- In the Automation section, click Add automation, set up the rule as above and click Save. The automation is saved right away.
Work that already exists doesn’t change.
Automations on a subtask template
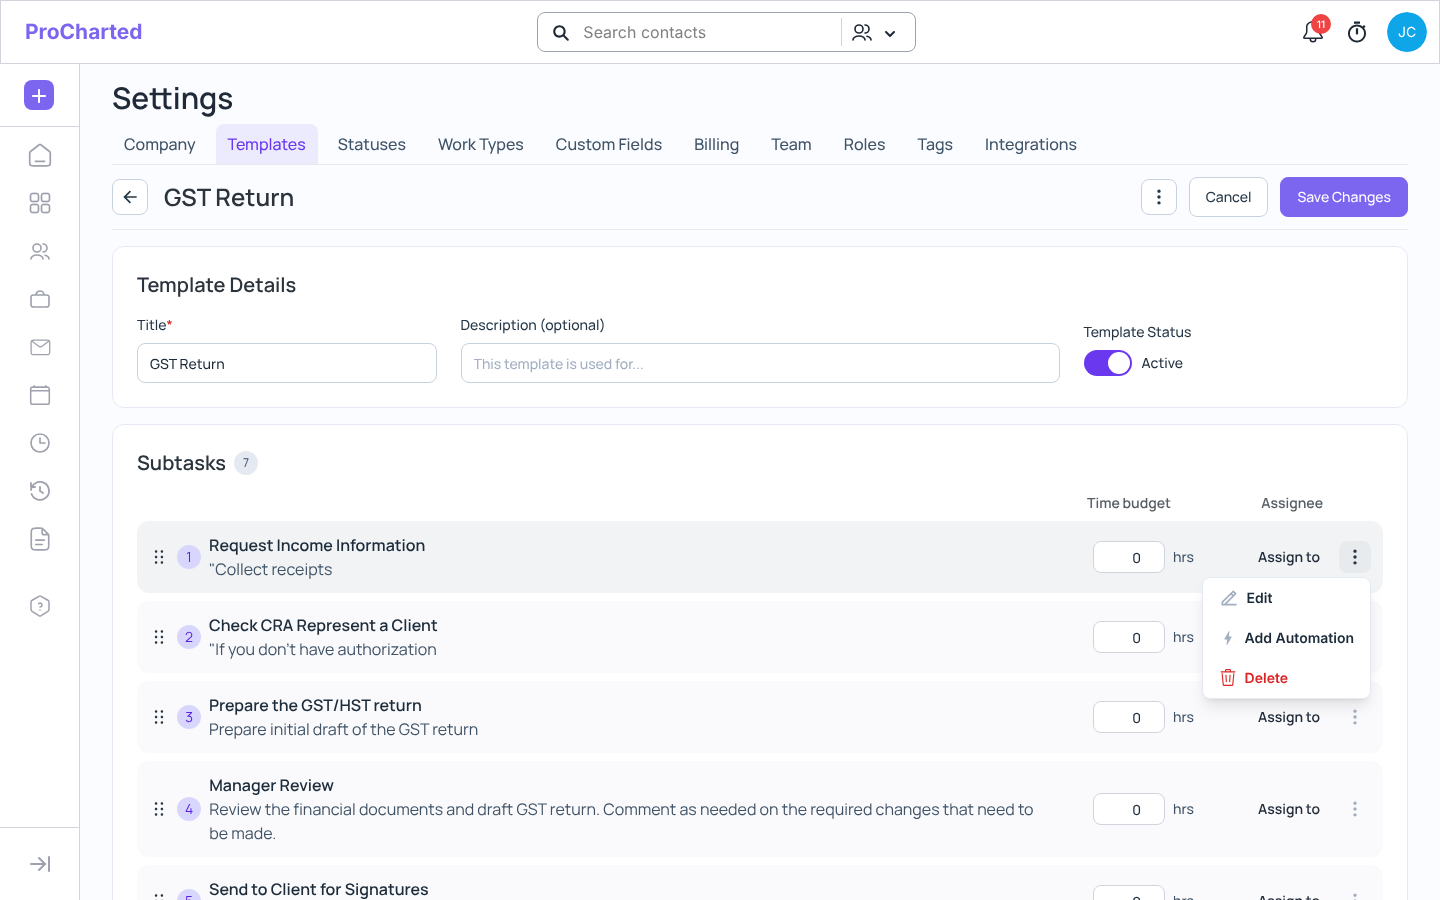
- Go to Settings > Templates > Subtask templates and open the template.
- Open a subtask’s ⋮ menu > Add Automation, and set up the rule. You don’t need to save the template first.
- Click Save Changes (or Add Template for a new template).
The ⚡ icon shows next to that subtask. When you create work with this template, the automation comes along with the subtask.
Tips
- You can also add an automation while creating work: New work > Add an automation > + Set up.
- Don’t see your status in the list? Add it to the work type first (Settings > Work Types > Assigned Statuses).
Related articles
- Inside a work item
- Create a status and add it to a work type
- Work types: defaults, automations and statuses
- Subtasks and subtask templates
- Email templates
- Create new work