
Billing
Invoices and payments
Create invoices (for up to 8 clients), link lines to work items, add billable time, email invoices, record payments and track what's outstanding.
Before you start
- You need to be an Admin or have the View Billings permission. Otherwise you’ll see a “You don’t have access to this page” message.
- To bill time, the time must first be tracked on the client’s work and be billable (see Track time with the timer). Non-billable time never shows up on invoices.
- To email invoices you don’t need anything extra: ProCharted can send them for you. To send them from your own mailbox instead, connect it first from Email in the left menu (Microsoft Outlook / Microsoft 365).
Create an invoice
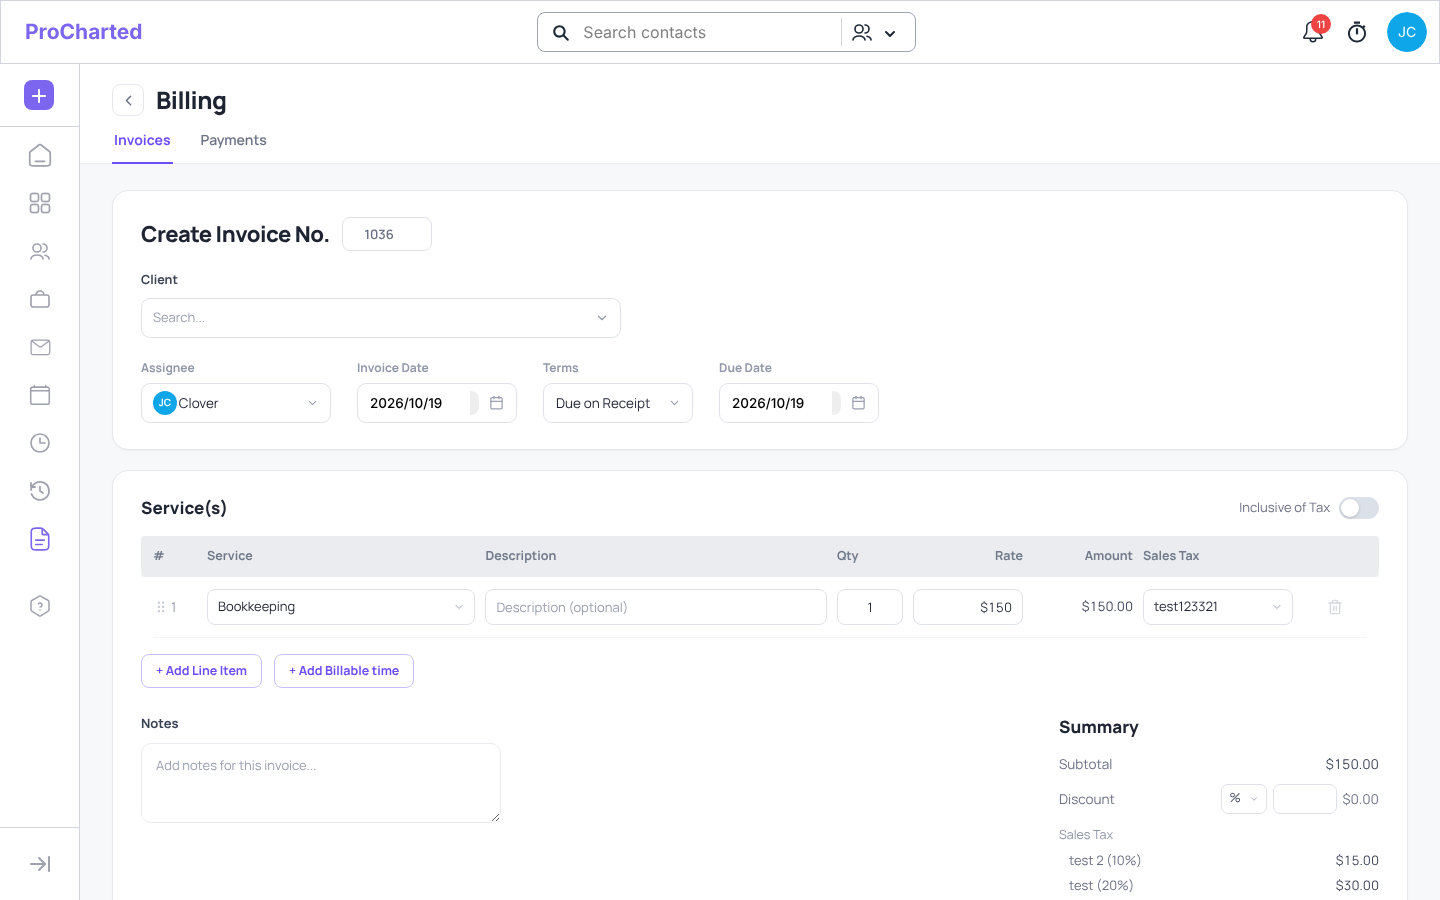
- Go to Billing > Invoices and click New invoice (or the purple + in the left menu > New Invoice). The Create Invoice No. page opens.
- Click the Client box. The client list opens with a Search clients… box at the top and a checkbox next to each name. Tick one or more clients, up to 8 (the first one you tick is the main client). Each one shows in the box with an x to remove it. The counter shows how many you’ve picked, for example 2/8 selected, and Clear all unticks everyone. Click Done.
- Assignee is filled in with you. Pick someone else, or choose None if the invoice shouldn’t have an assignee. Then check Invoice Date and Due Date (both start as today) and Terms (for example Due on Receipt, Net 15, Net 30 or Net 60; it starts as Due on Receipt). The Due Date can’t be before the Invoice Date.
- Add what you’re billing:
- + Add Line Item – pick a Service, add a Description, Qty and Rate, and the Sales Tax.
- Work item (under each line, optional) – pick the client’s work item this line is for, or leave Not linked to a work item. See Link invoice lines to work items below.
- + Add Billable time – pick billable time entries that aren’t on an invoice yet. These lines are linked to their work item automatically. (“There are no pending time entries” means there’s nothing left to bill.)
- Choose the Sales Tax. One tax rate applies to the whole invoice: changing it on one line changes it on all lines. Turn on Inclusive of Tax if your prices already include tax.
- Off (the default): tax is added on top. $100 with 5% + 7% tax = $5.00 + $7.00, total $112.00.
- On: the $100 already contains the tax. ProCharted works out the amount before tax ($100 ÷ 1.12 = $89.29) and calculates each tax on that: 5% = $4.46, 7% = $6.25. The total stays $100.00, and the Summary shows “Included in the amounts (on $89.29)”.
- Add Notes if needed and check the Summary: Subtotal, Discount (in $ or % of the subtotal), one Sales Tax line per tax (for example “Sales Tax (5%)”) and Total.
- Click Save Invoice – or use the arrow next to it and choose Create & Record Payment if the client has already paid.
If the Invoice No. is already used by another invoice, ProCharted asks first (Invoice number already in use). Click Change number to go back and type another number, or Use this number to save it anyway. Two invoices can share a number, but it’s usually a typo, so check first.
In the invoice list, an invoice with several clients shows the main client’s name and a
+N more chip. Click an invoice to open it.
Link invoice lines to work items
Each invoice line can point at one of the client’s work items. This shows which work you billed.
- In Create Invoice No. (or when you edit an invoice), pick the Client first.
- Under each line, open the Work item box and pick the work item, for example 2025 Tax Return (Ready). Leave Not linked to a work item if the line isn’t for one.
- Save the invoice. On the invoice page, the work item shows under the line’s description.
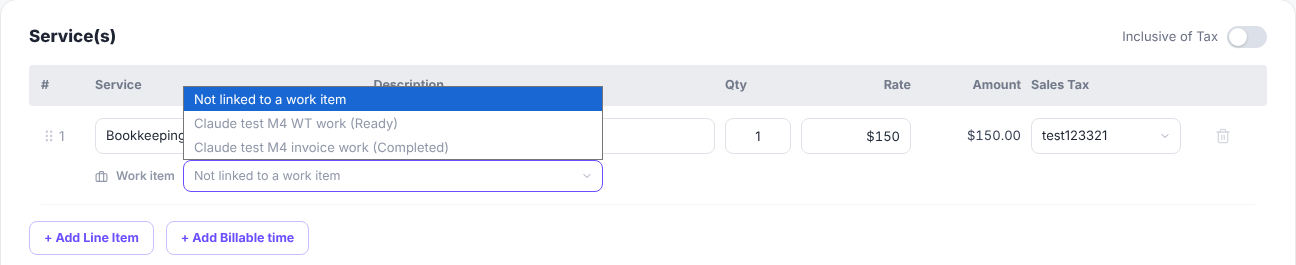
One invoice can cover several work items, and one work item can be on several invoices. Older invoices stay unlinked until you edit them and pick a work item for each line.
On the work item: the Summary tab has a Billing box with Billed, Paid and
Unbilled time (billable time not on an invoice yet), and the invoices for this work item (“No invoices for this work item yet.” when there are none). Click Invoice to start a new invoice for this client with the work’s unbilled time already added. The Billing box only shows for people with billing access.
Send an invoice by email
- Open the invoice from the Invoices list.
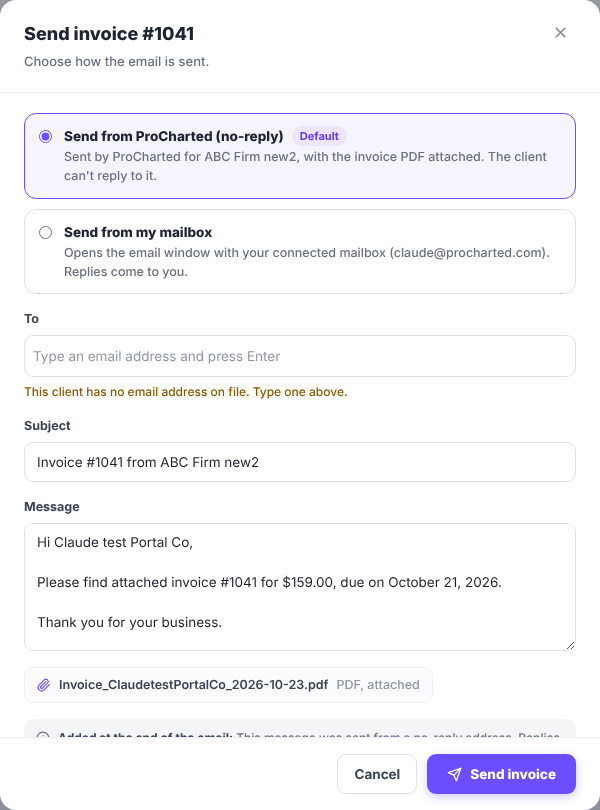
- Click Send Invoice. The Send invoice #N window opens. Choose how the email is sent:
- Send from ProCharted (no-reply) (the default) – ProCharted sends it for your firm, with the invoice PDF attached. The client can’t reply to it.
- Send from my mailbox – opens the email window with your own connected mailbox, so replies come to you. This choice needs a connected mailbox (see Connect your email).
- For Send from ProCharted (no-reply), check:
- To – the client’s email addresses on file. Type another address and press Enter to add it. “This client has no email address on file. Type one above.” means you need to type one.
- Subject and Message – filled in for you (invoice number, amount and due date). You can change them.
- The attached PDF, and the line added at the end of the email: “This message was sent from a no-reply address. Replies to this email are not read — please contact
directly.”
- Click Send invoice (or Open email window for your own mailbox).
To look at the PDF first, click View Invoice.
Choose a default tax rate
- Click your avatar > Settings > Billing > Tax Rate.
- In the Set as default column, turn on the switch of the tax rate you use most.
New invoices then start with that tax rate. Only one active tax rate can be the default, and you can still pick another one on any invoice.
Add your logo to invoices
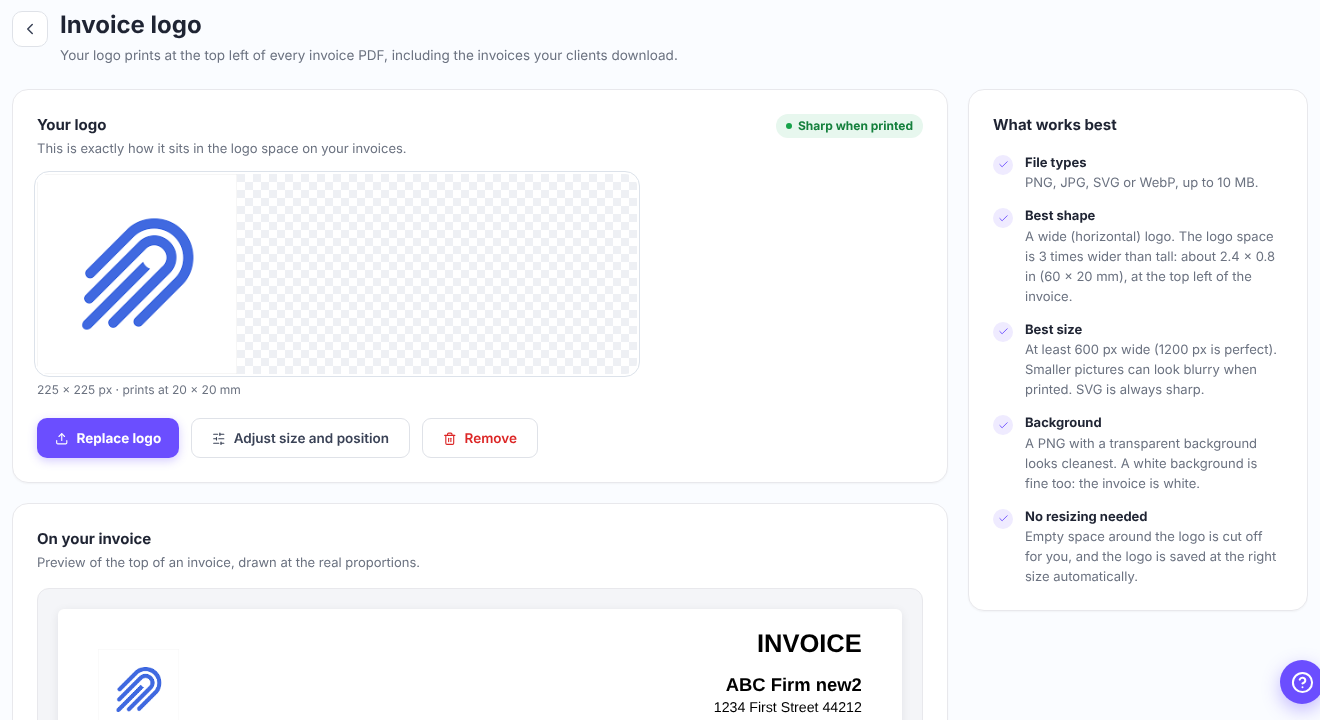
- Click your avatar > Settings > Billing > Logo. The Invoice logo page opens.
- Drag your logo onto the page or choose a file: PNG, JPG, SVG or WebP, up to 10 MB.
- Empty space around the logo is cut off for you. Under SIZE, use the slider or Fit in the space / Fill the space; under POSITION, choose Left, Center or Right (or drag the logo).
- Check On your invoice, a preview of the top of an invoice, then click Save logo.
Later, use Replace logo, Adjust size and position or Remove. The logo prints at the top left of every invoice PDF, including the invoices your clients download. A wide logo (about 3 times wider than tall, at least 600 px wide) looks best; What works best on the page explains more.
Add a note and a footer to every invoice
- Click your avatar > Settings > Billing > Notes & Footer.
- In Add note to customer, type a message, for example Thank you for your business. It appears on all invoices, under the totals.
- In Add footer, type what should go at the bottom of every invoice, for example your sales tax number or how clients can pay.
- Click Save.
To see how it looks, open an invoice and click View Invoice.
Find invoices
Use the filters at the top: Status (Not due yet, Overdue, Partially Paid, Paid),
Assignee, Client, Invoice Date and Label. Clear all removes them. Click the export icon to download the list.
Record a payment
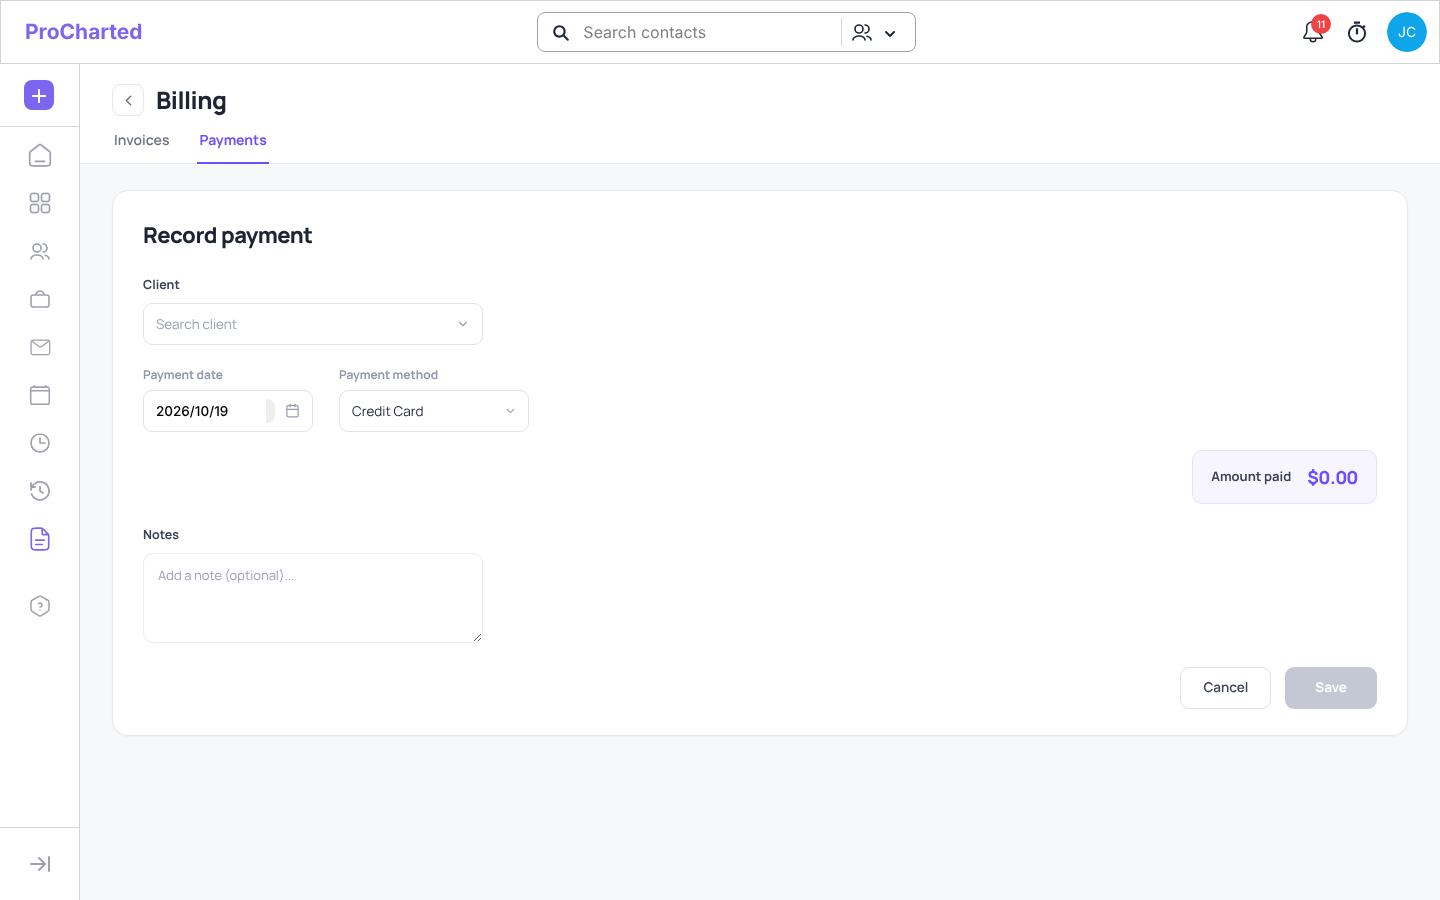
- Go to Billing > Payments and click New payment. The Record payment page opens.
- Choose the Client. Their unpaid invoices appear in a list.
- Pick the Payment date and the Payment method.
- Tick the invoice(s) being paid. The invoice’s balance is filled in; change it if the client paid only part. The total shows as Amount paid.
- Add Notes if needed and click Save.
Delete a payment
In Payments, open the payment’s menu > Delete. The invoices it paid show their balance again. This can’t be undone.
Tips
- An invoice can’t have more than 8 clients – you’ll see “Maximum of 8 clients reached”.
- “The due date can’t be before the invoice date.” – pick a due date on or after the invoice date.
- When you record a payment from an invoice, the payment date must be between the invoice date and today. On Billing > Payments > New payment, it can’t be in the future.
- Edit or delete an invoice from its row menu in the Invoices list.
- Time that’s on an invoice is locked: you can’t switch it to non-billable afterwards.
- Reports > Unbilled time (WIP) lists billable time not invoiced yet, with a Create invoice button per client.
Related articles
- Track time with the timer
- Connect your email
- Run a report and export it to Excel
- The client profile page
- Set up your firm