
Settings
Create a status and add it to a work type
How statuses work in ProCharted, and the two ways to create your own status and make it show up on your work.
How statuses work
- The four main stages are always there. You can set any work item to Ready, In Progress, Waiting or Completed. They are shown in blue, yellow, orange/red and green.
- Your own statuses sit inside a stage. “Waiting for documents” belongs to Waiting, “E-Filed” belongs to Completed, and so on. Reports, the Work page and the Home page group work by these four stages.
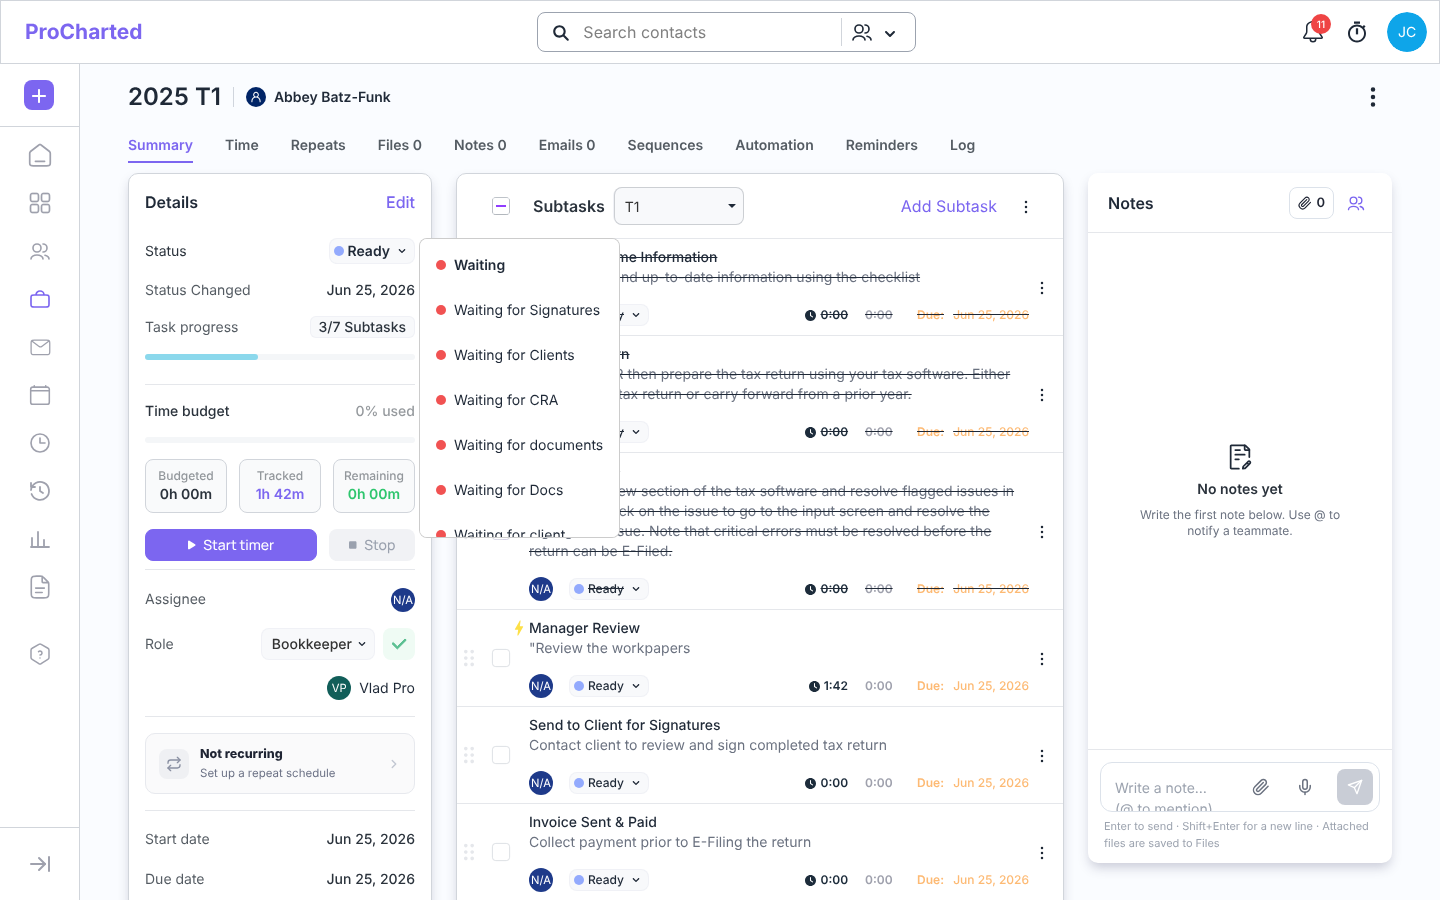
- Each work type has its own list. A personal tax return and a Payroll job can use different statuses. When you open a work item’s status list, you see the four main stages plus the statuses added to that item’s work type, and nothing else.
- Statuses are listed alphabetically inside each stage (numbers first), so a new status takes its place in the list by name.
- Scheduled is a special stage for work that starts in the future. You don’t set it up, and it doesn’t appear on the Statuses page.
So creating a status is a two-part job: create it, then add it to the work types that should use it. You can do both from either the Statuses page or the Work Types page.
Before you start
- You need access to Settings: Admins, or team members with the View Settings permission.
- Settings is in the avatar menu (your initials, top right) > Settings.
Option 1: Start from the Statuses page
Use this when one status should appear on several work types.
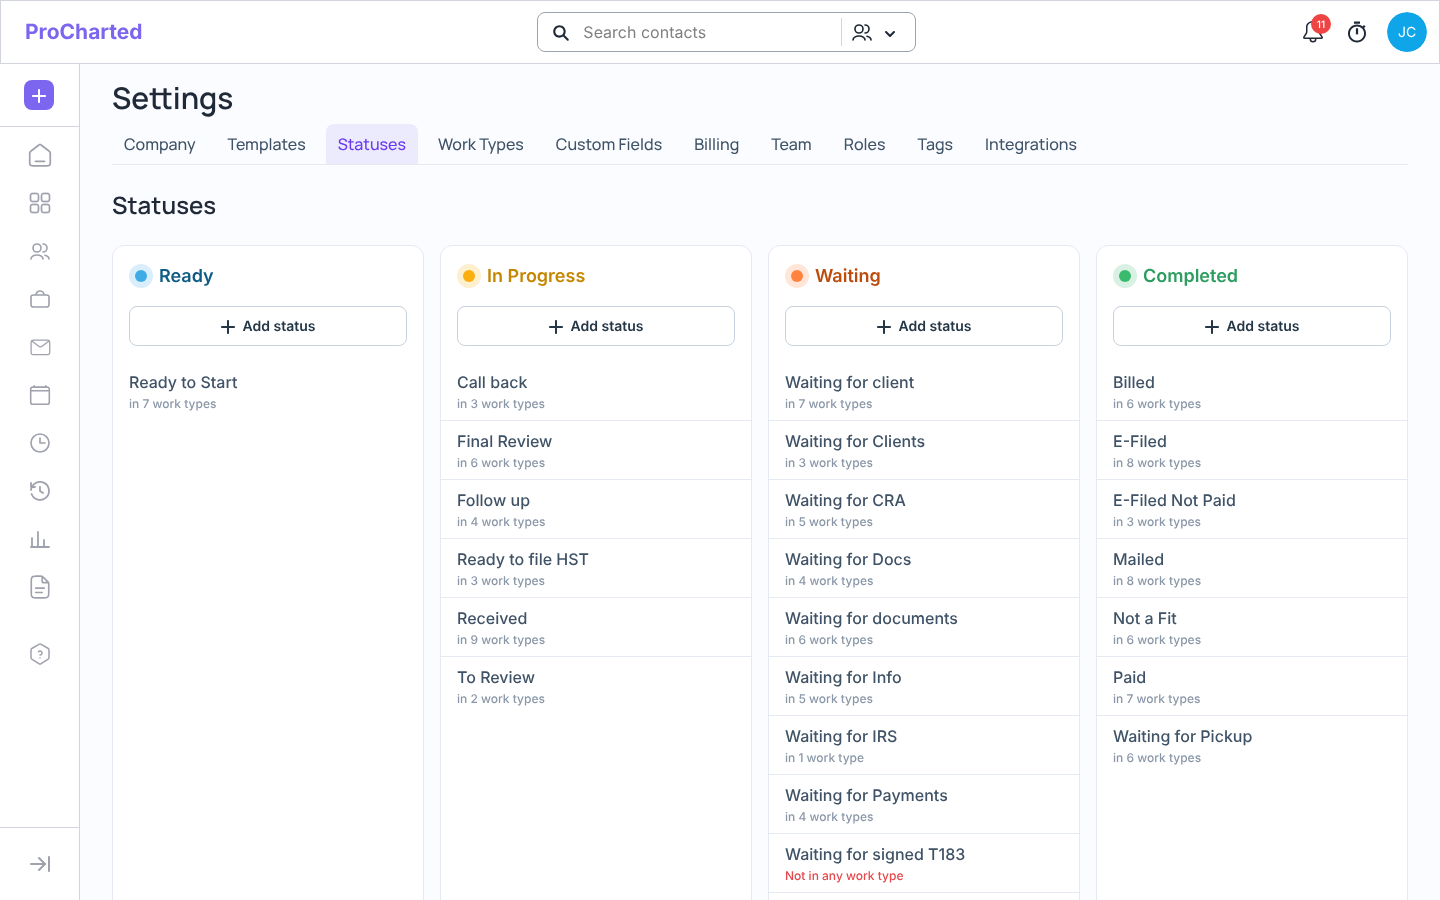
- Go to Settings > Statuses. You see four cards: Ready, In Progress, Waiting and Completed.
- In the card for the right stage, click + Add status.
- Type the name (for example Waiting for signed engagement letter) and click the purple ✓. Click ✕ to cancel instead.
- The new status appears in the card with Not in any work type in red. It can’t be used on any work yet.
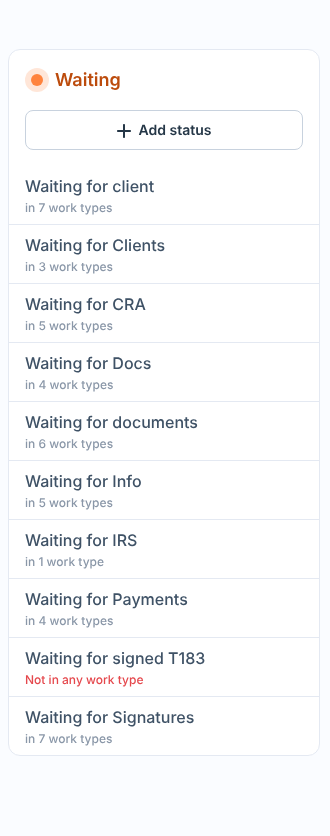
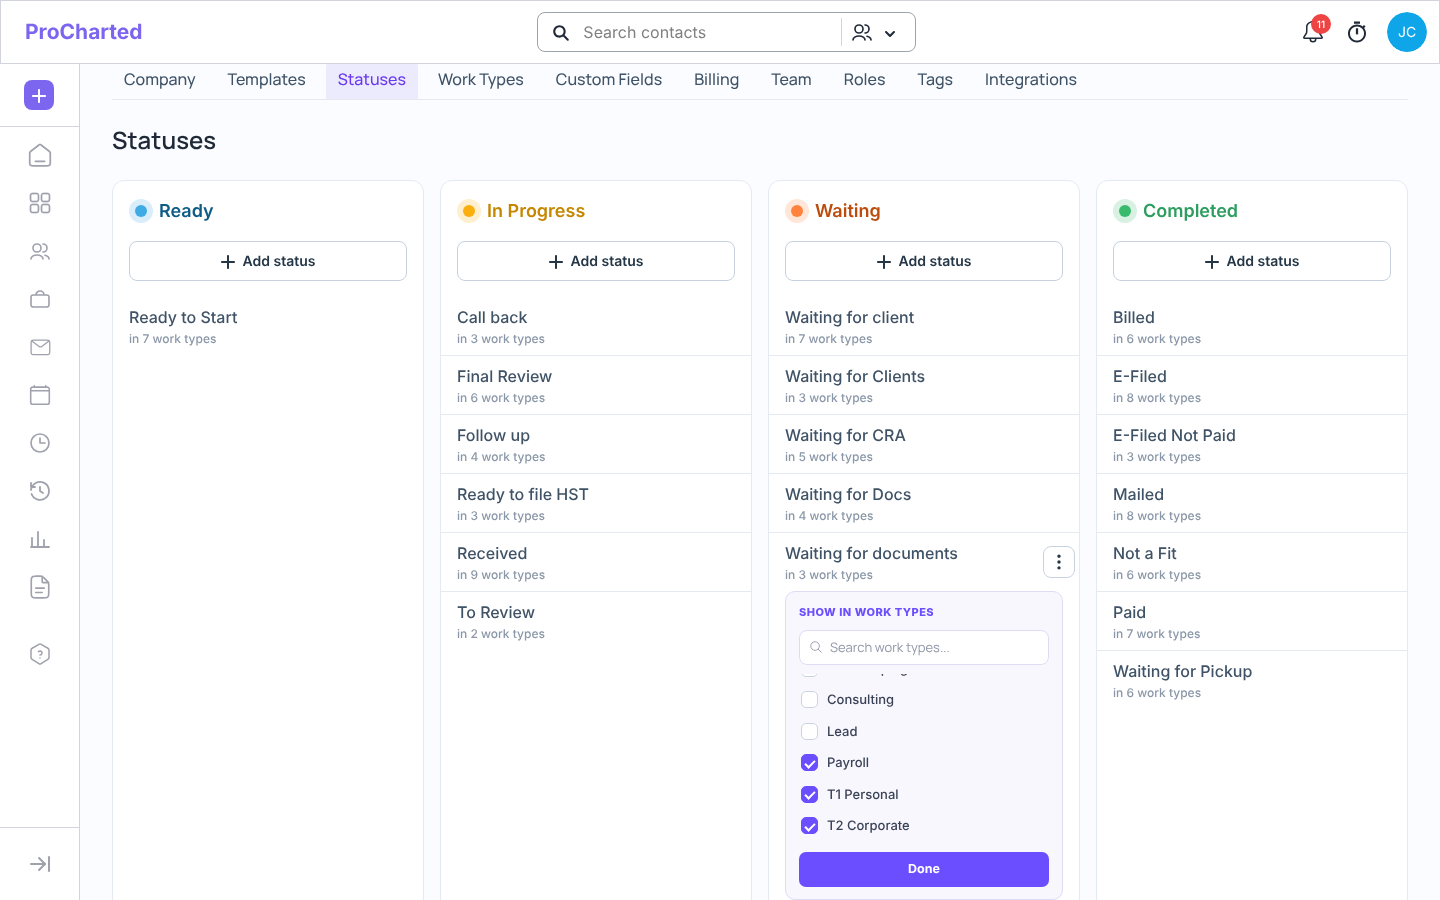
- Point at the status and click the ⋮ menu on the right, then Assign to work types.
- Tick each work type that should use it. Use Search work types… or Select all if you have many.
- Click Done. The change is saved straight away, and the line under the status changes to in N work types.
Option 2: Start from a work type
Use this when you’re setting up one work type and want to pick its statuses.
- Go to Settings > Work Types and click the work type, for example Personal Tax Return.
- Scroll to Assigned Statuses. It has the same four columns, showing the statuses this work type uses.
- Under the right column, click + Add Status.
- Either:
- tick existing statuses in the list and click Done, or
- click + Create new status, type the Status Name and click Save.
- Click Save Changes at the top of the page.
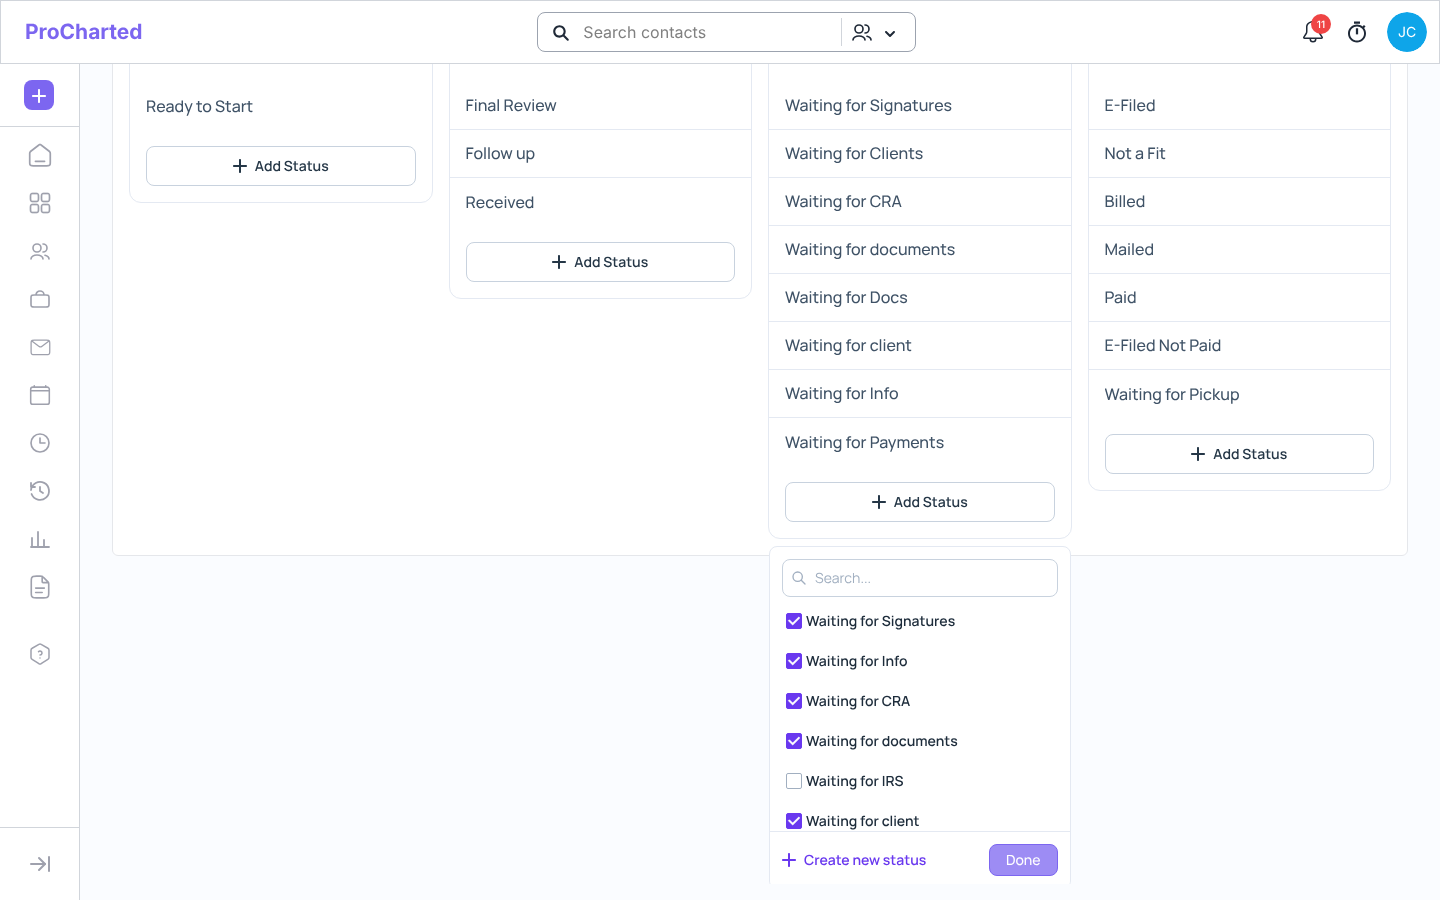
Good to know: a status made with + Create new status is created and added to this work type as soon as you click Save in that small window. Ticking existing statuses is only kept once you click Save Changes. If you leave without saving, ProCharted asks whether you want to Leave without saving.
Check that it worked
Open any work item of that work type and click its status on the Summary tab. Your new status appears under its stage.
Change, remove or delete a status
- Rename: Settings > Statuses > ⋮ > Edit.
- Take it off one work type: open the work type, point at the status in Assigned Statuses, click the ✕, then Save Changes. The status still exists for other work types.
- Delete it everywhere: Settings > Statuses > ⋮ > Delete, then confirm. Only do this for statuses you no longer use.
Tips
- “I can’t find my new status on a work item.” Check the line under it on the Statuses page. If it says Not in any work type, add it to that item’s work type (Option 1, steps 5–7). If it already lists work types, check that the work item uses one of them.
- Automations use the same lists. To trigger an automation on a status, or to change work to a status, that status must be on the work’s work type.
- Completed matters. When all subtasks of a work item are ticked, the work moves to Completed. Statuses under Completed (like E-Filed or Billed) count as finished work in the Work page’s Completed tab and in reports.
- Keep names short and specific (“Waiting for documents”, “Ready for review”). Your whole team picks from these lists every day.
Related articles
- Work types: defaults, automations and statuses
- Set up your firm: a checklist
- Automations
- Inside a work item