
Client portal
Share files and get documents signed through the client portal
Invite clients to a secure portal where they upload documents, download files you share, sign documents and download their invoices.
download their invoices. Their uploads land straight in the client’s files in ProCharted, so you don’t have to chase attachments by email.
Where to find it
Open the client (Contacts in the left menu, then click the client) and click the
Client portal tab. It has three tabs of its own:
- Files – everything the client sees in the portal: their uploads and the files you share.
- Signatures – documents sent for e-signature, and their progress.
- People – who can sign in to the portal.
Invite a client to the portal
- On the client’s Client portal tab, open People and click + Invite.
- In the Invite to client portal window, tick the contacts who should get access. Someone who isn’t a contact yet? Click + Add someone who isn’t a contact yet, type their Name and Email, and click Add to the list.
- Check the Message in the invitation email and change it if you like.
- Click Send 1 invitation (the number matches the people you ticked).
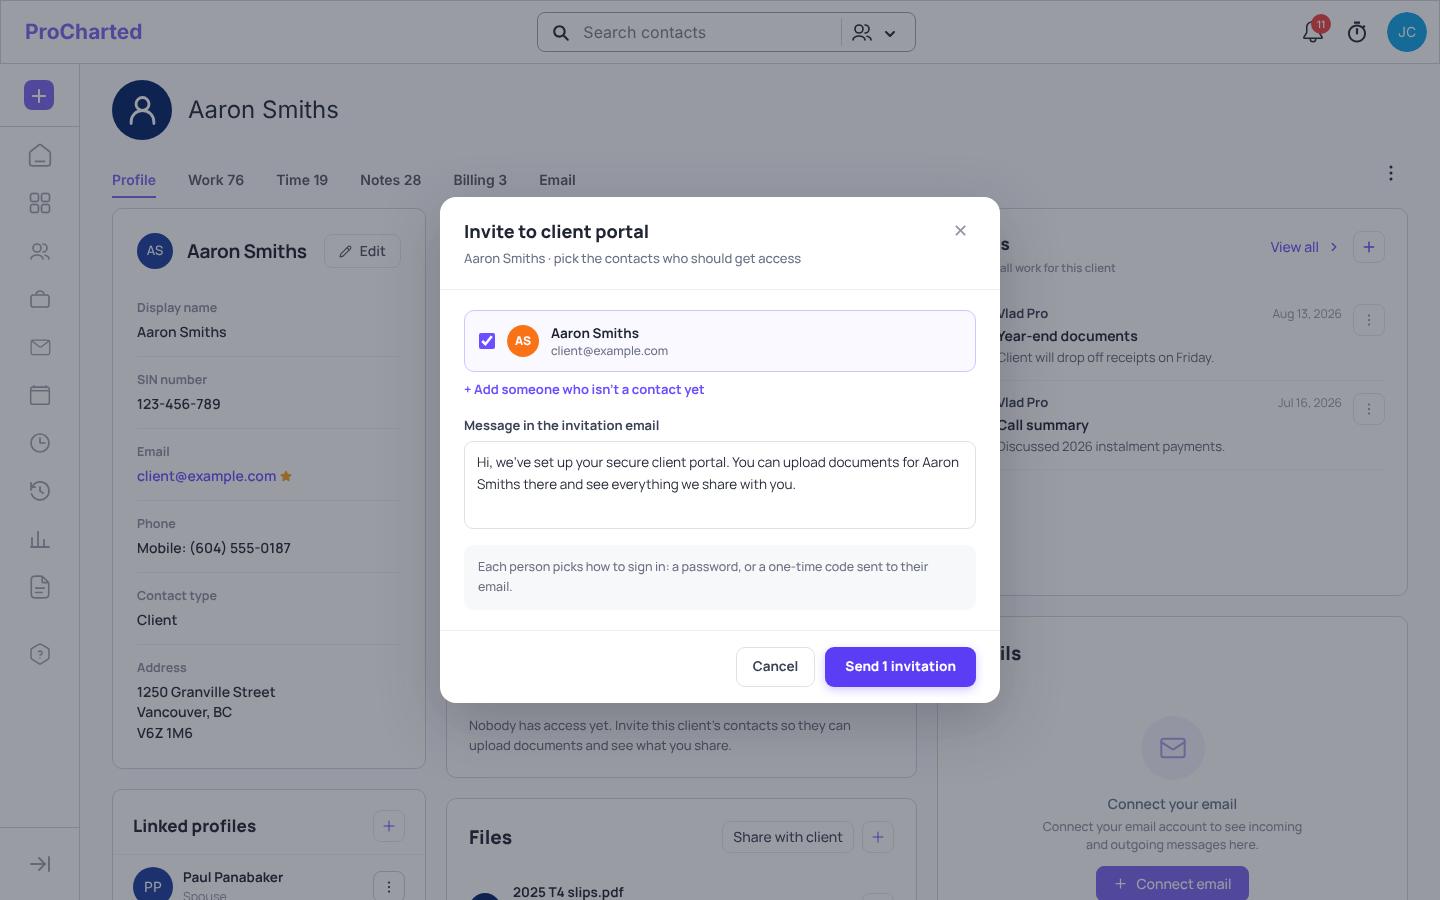
Each person gets an email with a link to set up their access. The link works for 14 days.
Manage who has access
The People tab lists everyone who was invited:
- Active – they have signed in.
- Invited – they haven’t set up access yet. Click Resend to send the invitation again.
- To take away someone’s access, click ✕ (Remove access) on their row and confirm. Files they already uploaded stay on the client’s profile, and you can invite them again later.
See what the client sent you and share files
The Files tab (and the Files card on the Profile tab) has filters: All,
From client (files the client uploaded, with the person’s name and their note, if any) and
Shared (files you shared). New uploads show a New tag the first time you look. You also get a notification when a client uploads files.
To share files with the client:
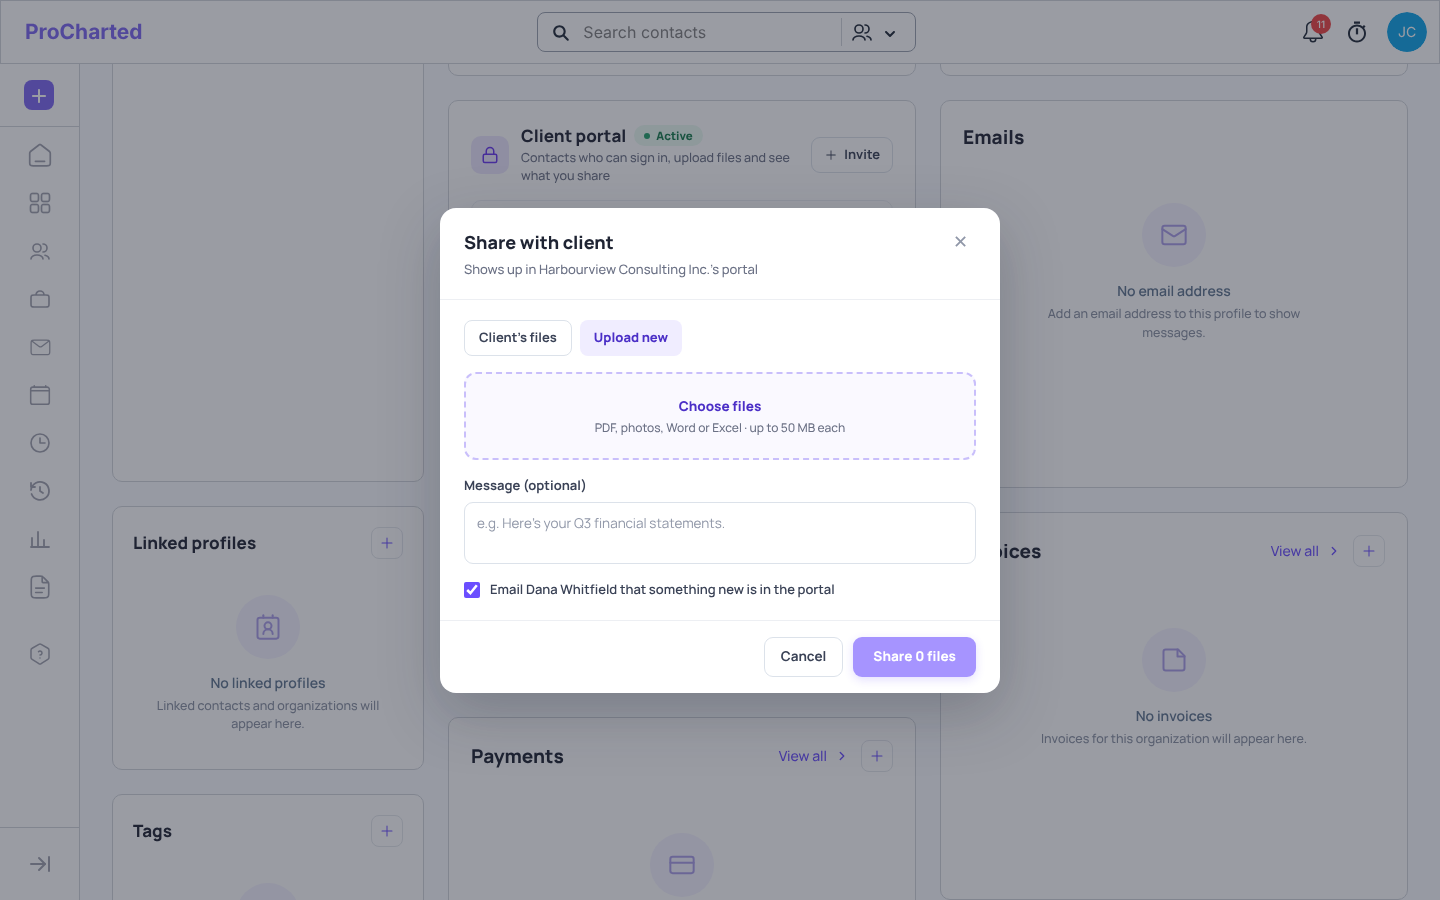
- Click Share files on the portal’s Files tab (or Share with client on the Profile tab’s Files card).
- Pick files already on the client’s profile, or upload new ones (PDF, photos, Word or Excel, up to 50 MB each).
- Add a Message (optional) and leave the email option ticked to let the client know.
- Click Share 1 file (or Share N files).
Get a document signed (e-signatures)
Upload the PDF to the client’s files first.
- On the Client portal tab, open Signatures and click Request signature.
- Choose the PDF and click Next: place fields.
- In Step 1 of 2 · Place fields, set up the Signers: + Add client signer (one of the client’s people) and, if someone at your firm must sign too, + Add me (shown as You (countersign)).
- Pick a signer, then place their Fields on the page: Signature, Initials, Date signed, Name, Text box or Checkbox. Drag a field to move it.
- Click Next. In Send for signature, check the Subject and message, and choose a Sign by date and Reminders (Off, Every 3 days or Every week).
- Click Send.
Each client signer gets an email with a personal link. They confirm who they are with a one-time code sent to their email, then sign in the portal.
On the Signatures tab you can follow each request: Send reminder, Cancel request, or Sign now when it’s your turn to countersign. When everyone has signed, the signed copy is saved to the client’s files and shared with the client (“Signed copy saved to Files and shared with the client”).
Show an invoice in the portal
Invoices aren’t shown to clients until you choose to.
- Open the invoice (Billing > Invoices).
- In the Client portal box (“Not shown to the client”), click Show in portal.
- Optionally tick the box to email the client, then confirm with Show in portal.
To hide it again, click Stop showing. Clients can view the invoice and download its PDF; they can’t pay online from the portal.
What your client sees
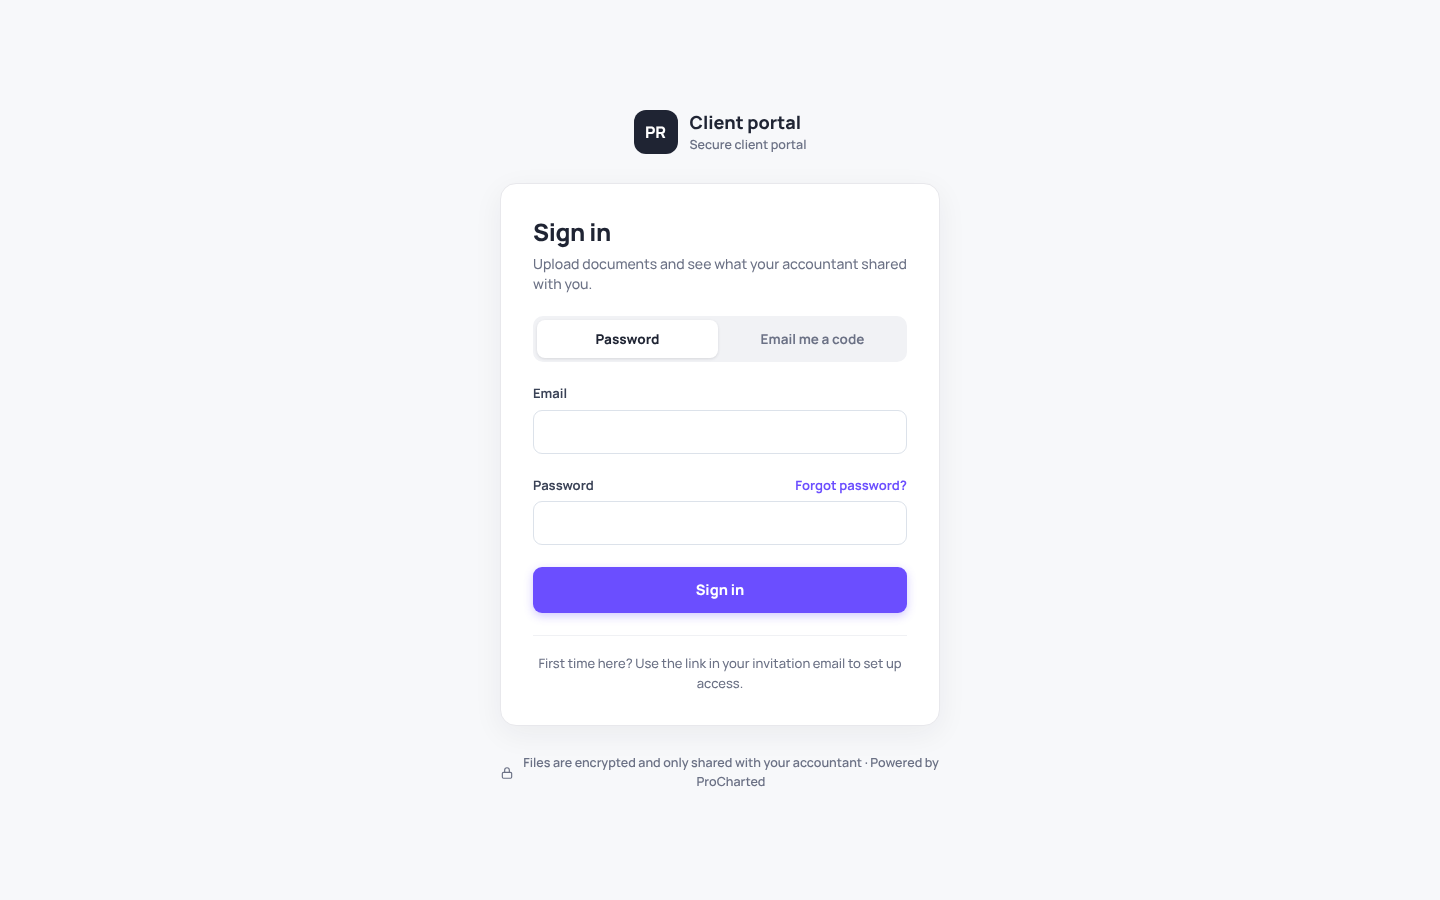
Signing in. The client opens the link in their invitation and chooses how to sign in: with a password, or with a 6-digit code sent to their email (no password needed). Later they sign in on the same page with Password or Email me a code. A code works for 10 minutes.
Uploading documents. They drag files onto the page or click Choose files (on a phone they can also tap Take a photo; up to 50 MB per file). The files wait under
Ready to send, they can add a note for you, and then they click Send. Their files are listed under Your uploads. A client can delete their own upload until someone at your firm has seen it.
Downloading your files. Everything you share is under Shared with you.
Signing. Documents to sign appear under Waiting for your signature. The client clicks each field (Click to sign), chooses how their signature looks in Adopt your signature (type their name or draw it) and clicks Finish.
Invoices. Invoices you show in the portal are in the Invoices card, each with
Download PDF.
Several clients. If the same person belongs to more than one client (for example themselves and their company), they can switch between them from the client name at the top of the portal.
Tips
- Ask clients to add a short note when they upload (“March bank statements”) – it shows with the file in your files list.
- An archived client can’t get new invitations or shared files until you move them back to active.
Related articles
- The client profile page
- Add and edit a client
- Invoices and payments
- Your profile and notifications
- Activity Log