The client list – search, filter, bulk actions and importing
Find clients quickly, act on several at once (create work, archive, tag, export, email) and import clients from a spreadsheet.
In short:Contacts in the left menu opens your firm’s list of clients – individuals and organizations. Search and filter at the top, tick clients to act on several at once, or import many clients in one go from a spreadsheet.
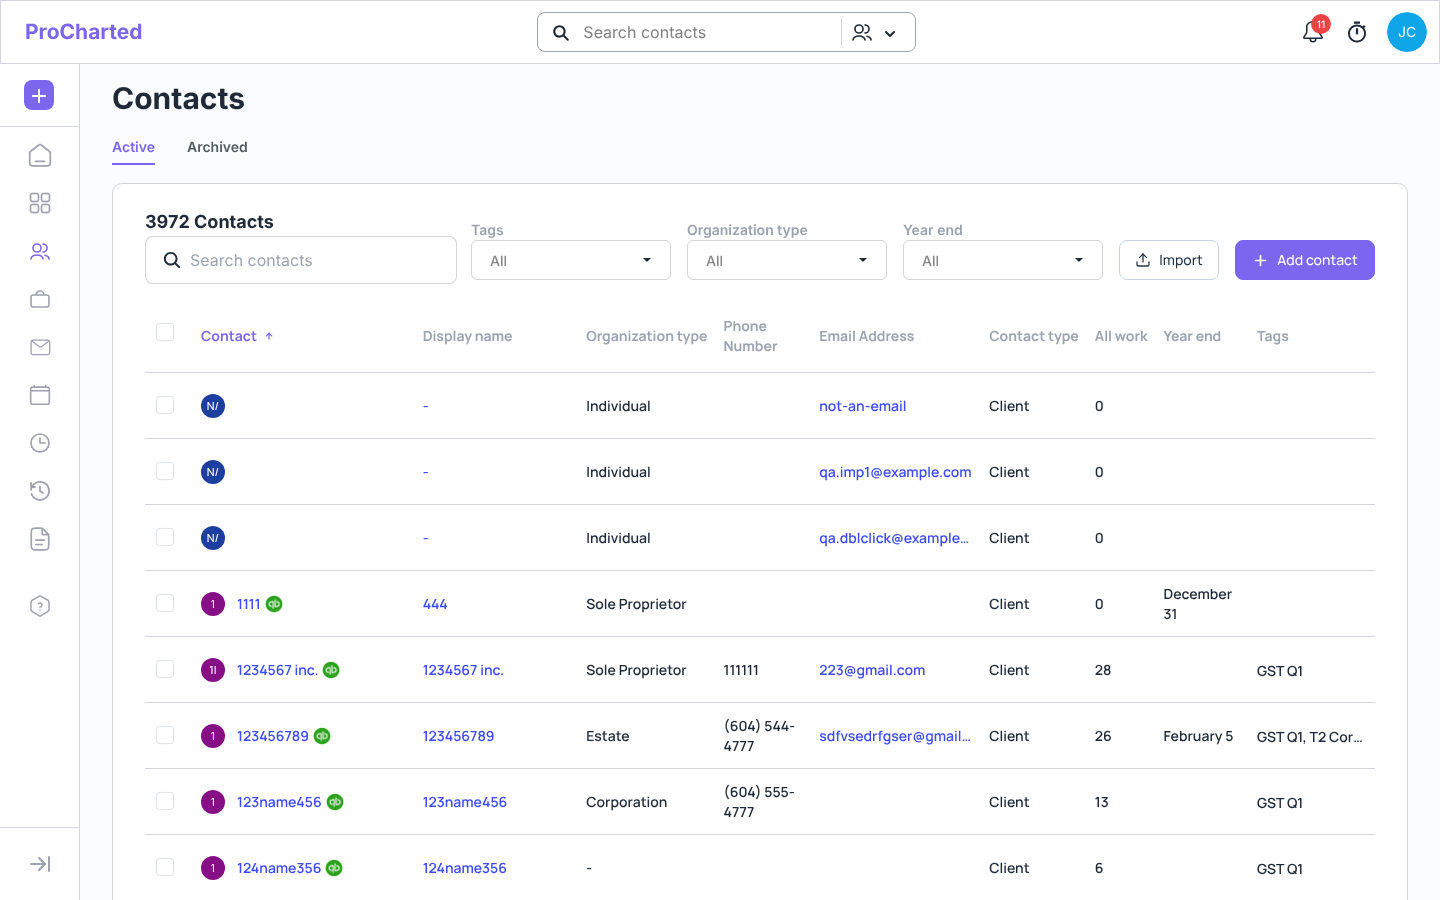
The Contacts list
Find a client
Click Contacts in the left menu.
Type in Search contacts, or use the filters Tags, Organization type and Year end.
Click a client’s name to open their profile.
The list shows: Contact, Display name, Organization type, Phone Number, Email Address, Contact type, All work (the number of work items), Year end and Tags. A QuickBooks icon next to a name means the client is synced with QuickBooks Online. The list shows 20 clients per page.
Do something with several clients at once
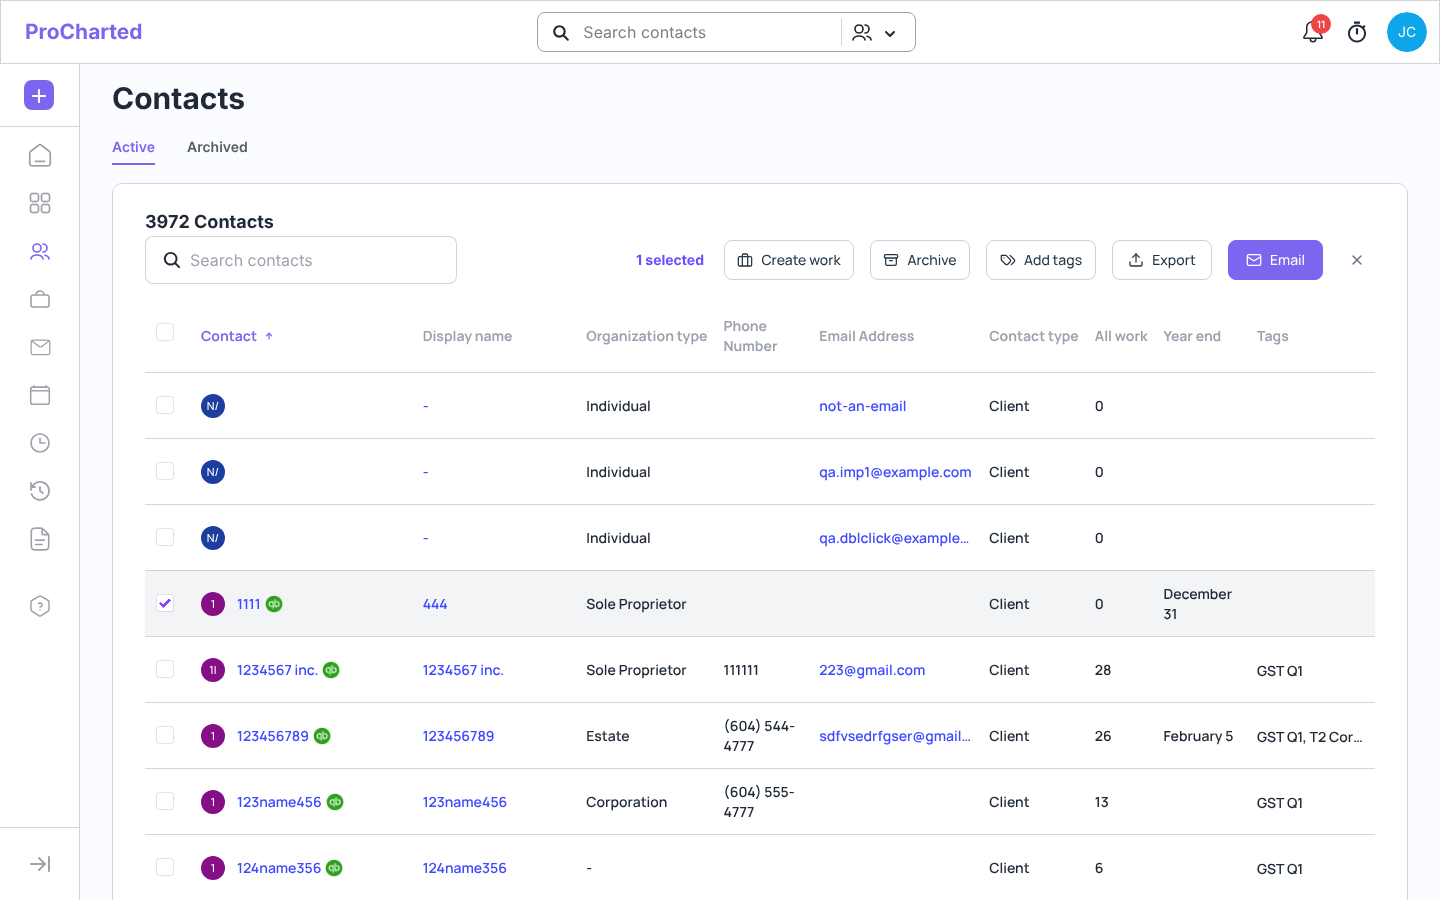
Tick the box next to each client (or the box in the header to tick the whole page).
The buttons at the top change to:
Create work – opens New work with these clients already filled in. Each client gets its own work item.
Archive – archives them (you’ll be asked to confirm).
Add tags – adds one or more tags to all of them.
Export – downloads the selected clients.
Email – writes an email to them.
Click the X to clear your selection and get the normal buttons back.
Buttons after ticking a client
Import clients from a spreadsheet
Individuals and organizations are imported separately, each with its own template.
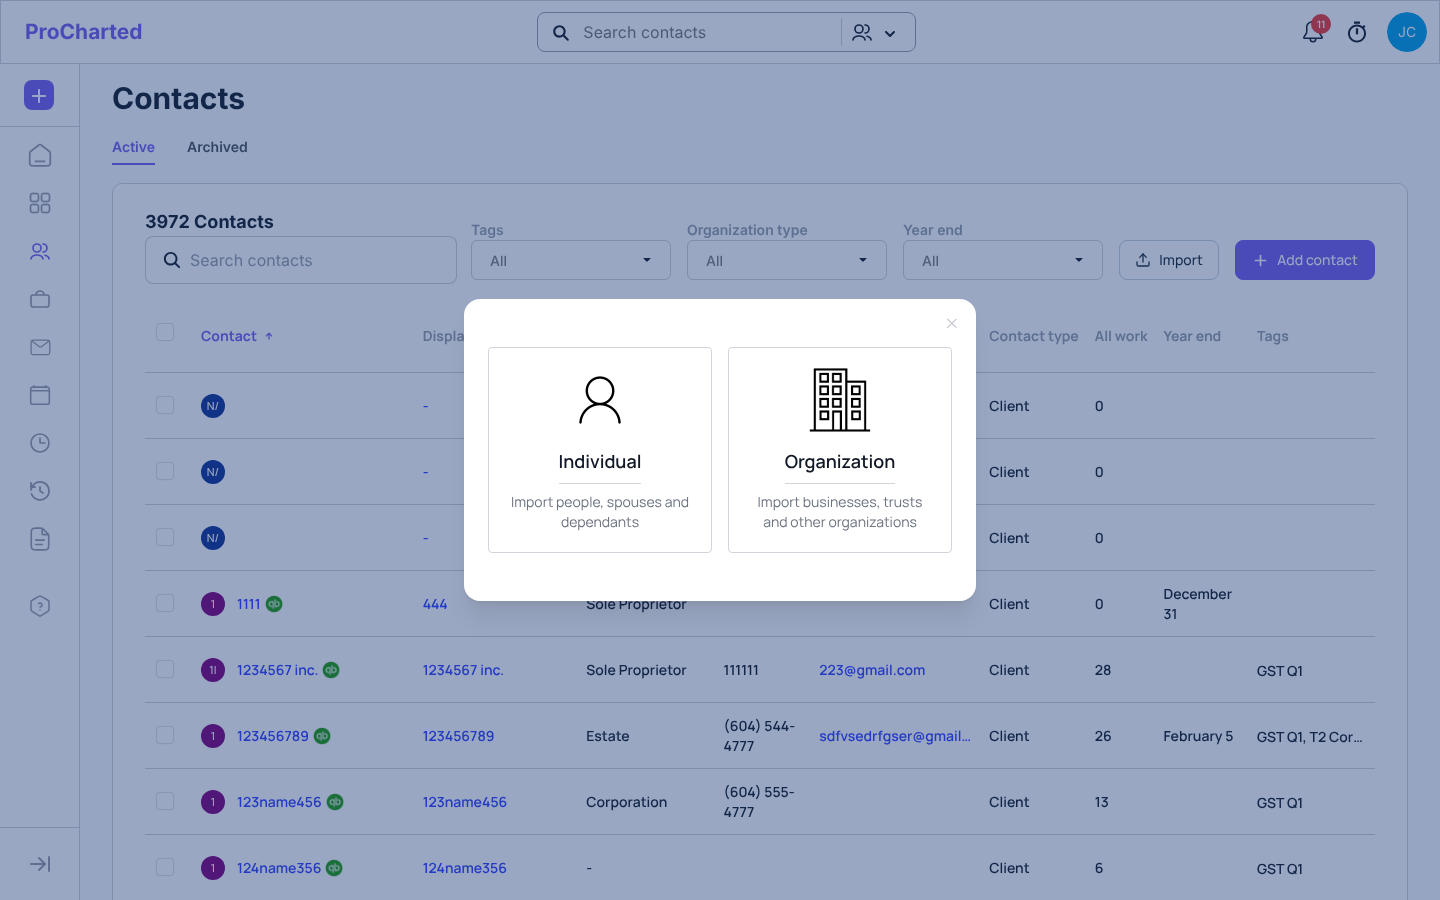
In Contacts, click Import.
Choose Individual (people, spouses and dependants) or Organization (businesses, trusts and other organizations).
Choose what to import
Click Download template. The file has only the column headings, no sample rows. The required columns are marked with a *: FirstName* and LastName* for individuals, CompanyName* for organizations. The window reminds you which columns are required.
Fill in one client per row, keeping the column headings as they are.
Save the file as CSV (in Excel: File > Save As > CSV (Comma delimited)). Only CSV files can be imported.
Back in ProCharted, drag your file onto the box, or click Click here to choose it.
ProCharted asks Continue uploading ““? Check you picked the right file, then click Continue.
When it’s done, ProCharted tells you how many clients were imported (Import finished). If some rows couldn’t be imported, it lists each one with the row number and the reason, so you can fix them and import just those rows again.
Tips
Once an import has started it can’t be cancelled, so check your file before you click Continue.
The template covers the main details, such as names, SIN or business number, email, phone and address. Anything that isn’t in the template – for example tags, linked profiles or custom fields – you add afterwards on the client’s profile.
“Nothing was imported” – check that the file is a CSV, the column headings are unchanged and the required columns are filled in.