
Contacts
Group clients with tags
Create tags in Settings, add them to clients one by one or in bulk, filter your client list by tag and create work for everyone with a tag.
Before you start
Creating, editing and deleting tags is done in Settings, so you need Settings access (Admin or the View Settings permission). Anyone in the firm can add existing tags to clients.
Create a tag
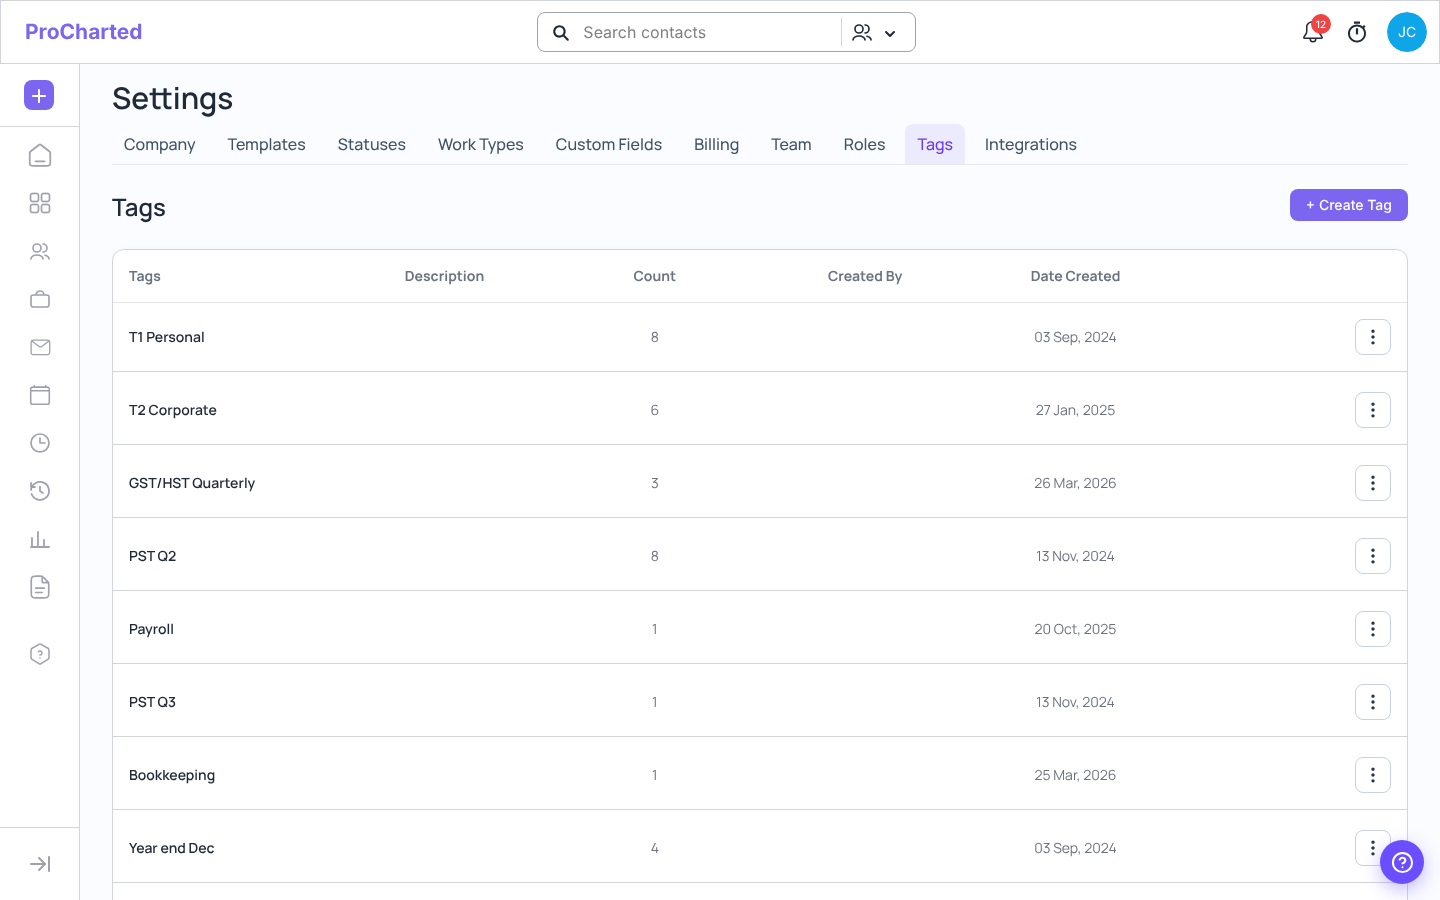
- Click your avatar and choose Settings, then open the Tags tab.
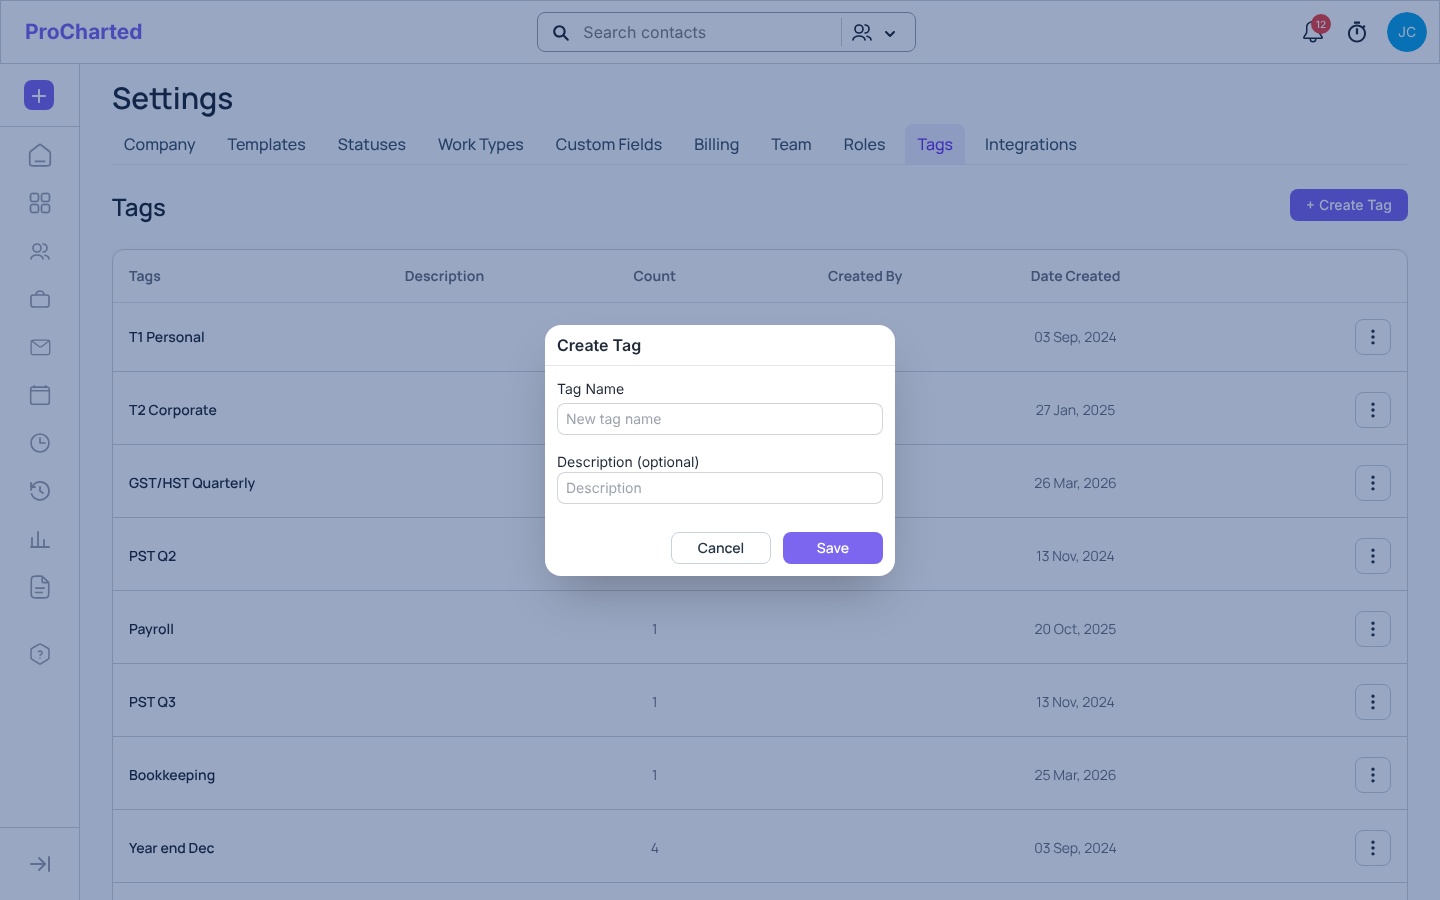
- Click + Create Tag.
- Type the Tag Name (up to 30 characters; a longer name shows “Tag names can be at most 30 characters.”). Each name can be used once: “A tag named “…” already exists.” means you already have it.
- Add a Description (optional) (up to 50 characters), e.g. “Clients we do payroll for”.
- Click Save.
The Tags list shows each tag with its Description, Count (how many clients have it),
Created By and Date Created.
Edit or delete a tag
- In Settings > Tags, click the ⋮ at the end of the tag’s row.
- Choose Edit to change the name or description in the Update Tag window, then click Update.
- Or choose Delete to remove the tag. ProCharted asks first (Delete ‘
‘ tag? ) and tells you how many contacts use it. Click Delete to confirm: the tag is also taken off those contacts.
Add tags to a client
When you add a new client: the New Individual and New Organization windows have a
Tags box. Pick one or more tags there. See
Add or edit a client.
On the client’s profile:
- Open the client and find the Tags card on the Profile tab.
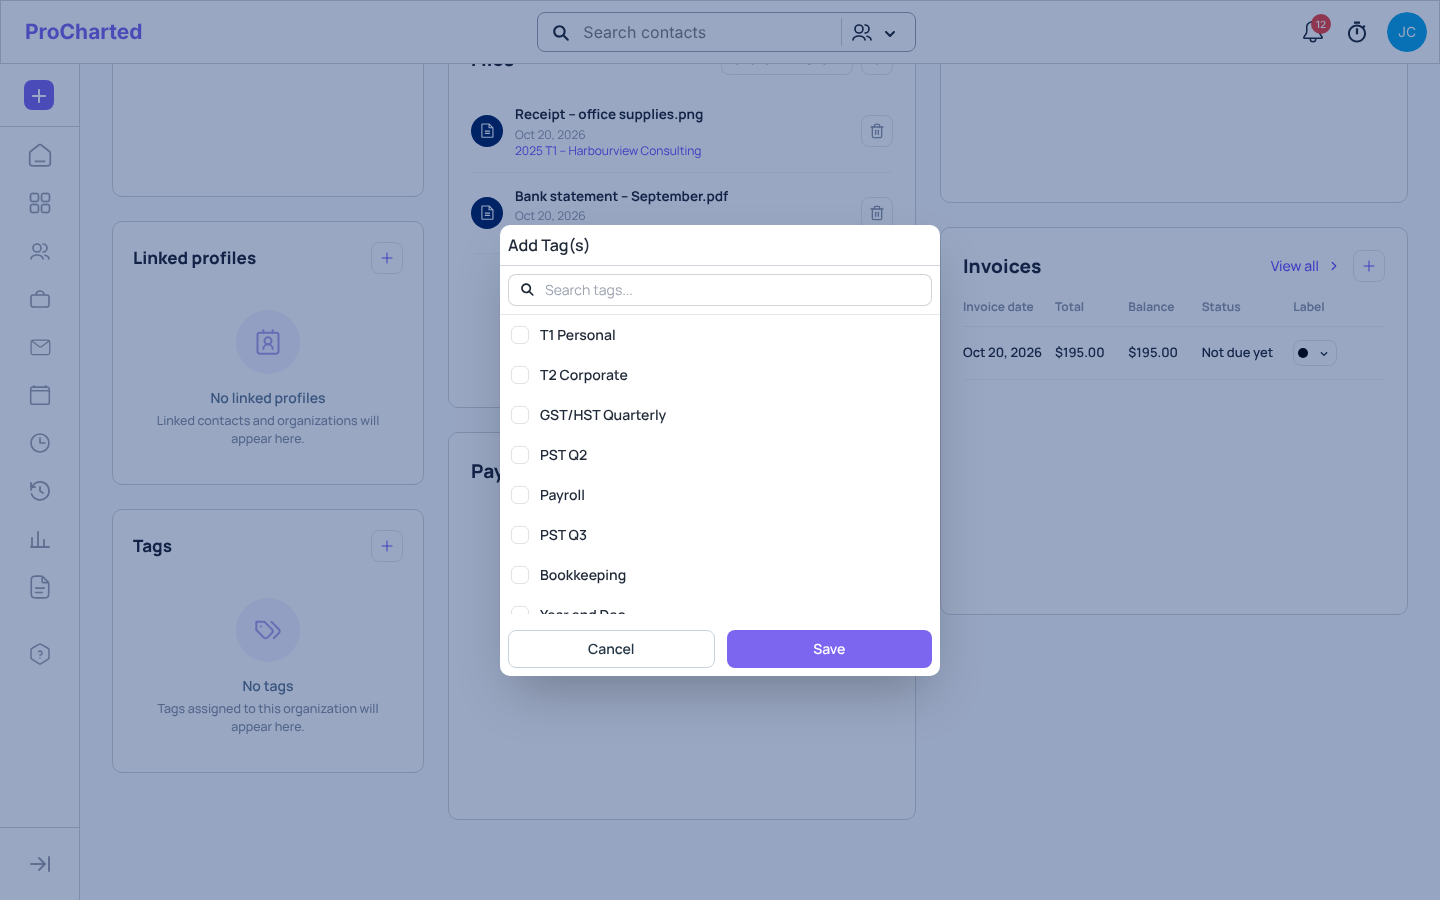
- Click + (Add tag). The Add Tag(s) window lists all your firm’s tags.
- Type in Search tags… to narrow the list, then tick each tag you want.
- Click Save.
To take a tag off, untick it in the same window and click Save, or click ⋮ next to the tag on the Tags card and choose Delete. This only removes the tag from this client; the tag itself stays in Settings.
Several clients at once:
- In Contacts, tick the clients.
- Click Add tags.
- Open the Select… box and choose the tags. The window says “This tags will be added to the selected clients”.
- Click Add.
Find clients by tag
In Contacts, open the Tags filter at the top of the list and pick one or more tags. The list then shows only clients with those tags. The Tags column shows each client’s tags. See
The client list.
Create work for everyone with a tag
- Click the purple + at the top of the left menu and choose New Work (or click + Create Work on the Work page).
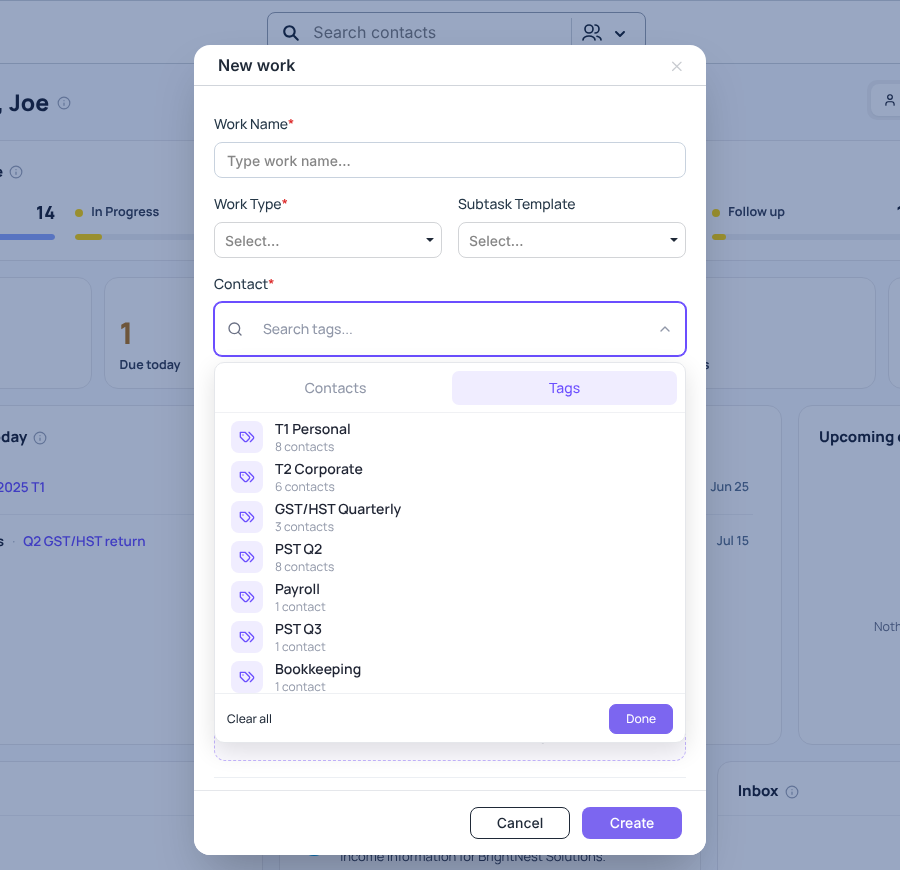
- In Contact, switch to the Tags tab.
- Pick a tag. Each tag shows how many clients have it.
- Fill in the rest of the window and create the work.
Each client with that tag gets their own copy of the work item. See
Create new work for the full steps.
Tips
- Tags are only created in Settings > Tags. If the list in a client’s window is empty, ask someone with Settings access to create the tags first.
- Keep tag names short and clear, so they fit in the client list.
- Tags don’t have colours; they all look the same.
Related articles
- The client list – search, filter, bulk actions and importing
- Add or edit a client (individual or organization)
- The client profile page
- Create new work
- Custom fields – add your own information to clients